Archive for category: Arts & Crap

Mod Deer Hoof Coat Rack

*DISCLAIMER: I used this project awhile back as a guest blog for someone else. It caused a mild uproar when a woman commented that it was ‘gross’. If you don’t like to see the hooves of deer, please bail out now.
I would hate to gross you out. Over and out.*

I have been wanting a coat rack by our front door for a couple of years. Our guests must pile their coats on our bed, which of course becomes the perfect nesting ground for Cowboy.
I live in a part of the country where the phrase ‘He’s packing’ doesn’t mean ‘He’s preparing for a trip’.
Naturally, I thought, ‘If one can make gun racks out of deer hooves, why can’t one make a coat rack out of them?’
I searched on ebay and found five deer hooves that would be shipped to me for $5 each.


What you will need:
Wood Paneling-I bought my 3/4” tongue and groove from Habitat for Humanity
3/4” x 1” ‘L’ shaped trim
Deer Hooves
Lag Screws-mine are 2”
Epoxy
Oops Paint-I used glossy black
Paintbrush
Level
Tape Measure
Sawzall with metal blade, or a hand saw with metal blade
Skill Saw with a wood blade
Square
Drill & Drill bit a little smaller than your lag screws
Studfinder


You’ll also want a:
Hammer
Finish Nailer, Nails & Compressor (or you can use ‘brad’ nails & a hammer)


My wood was pretty damaged in several areas. I determined that I had enough to make a 30” x 34” coat rack. I marked the pieces that I wanted and drew a ‘cut’ line using my square.


Using my skill saw, I cut those suckers down and then double checked for accuracy.
I always double check myself. My accuracy tends to be unreliable. I guess you could call me ‘reliably unreliable’.
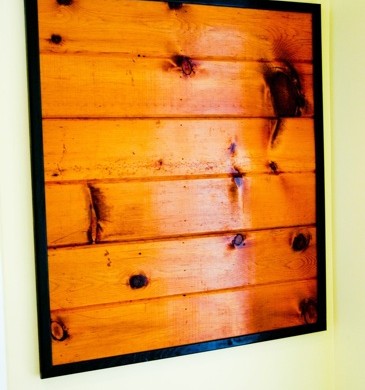

Find your studs by using a ‘stud finder’ or tapping a hammer lightly against the wall.
Starting with your top board, make sure it’s level before using your finish nailing to attach it straight to the wall and hitting the studs.
I painted my ‘L’ shaped trim black and cut the ends to fit at a 45 degree angle. I used my finish nailer again to attach the trim to the tongue and groove boards.
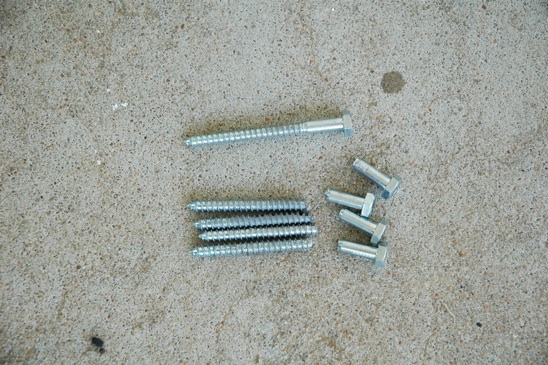

My deer hooves did not have a screw already mounted in them-some do. If yours don’t, clamp the heads of your lag screws with a strong table vice and use a metal bladed sawzall or hand saw to cut the heads off of the screws.
‘Off with their heads!’


Place the cut end of your lag screw into the hoof, filling the entire cavity with epoxy. Let dry for the manufacturer’s recommended time.
That is Biceps’ un-manicured hand, not mine. However, mine isn’t far from this….
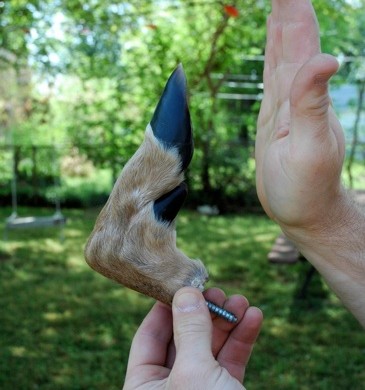

Once the epoxy has hardened, give your hoof a ‘high-five’ just for good measure and to keep the neighbor’s guessing.
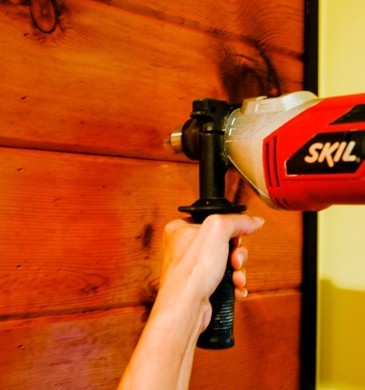

Using your level, mark where you would like your hooves to be attached on the wood paneling. Drill pilot holes into your wood paneling.
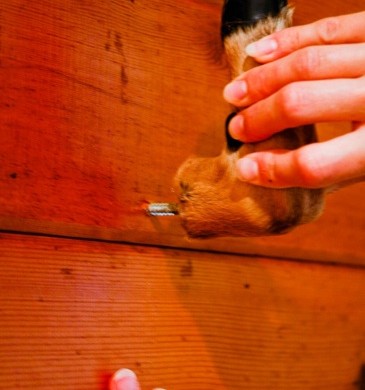

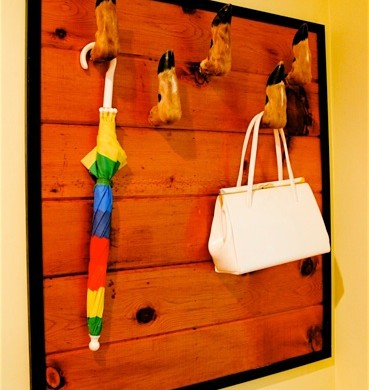
Screw your hooves into the pre-drilled holes and then stand back to enjoy your creation.
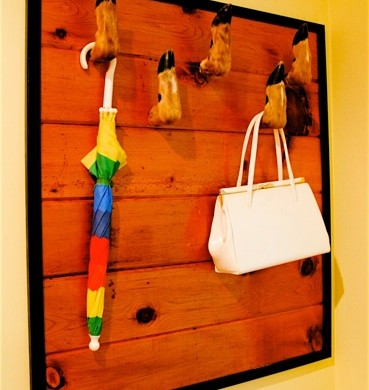

‘Modern-Bohemian’ is what I call it…with a touch of ‘weird-functionality’.
I hope I didn’t gross you out. Please let me know if I did…
Read more

Va-Va-Voom Vintage Tablecloth Dress

Grandma Greiman sent me away from her farm with a trailer full of treasures.
This old tablecloth was barely holding on to its original embroidered flowers and I couldn’t bear to throw it out or tear it up into scraps.
So, why not throw in a scarf for good measure and make a dress?

Scarves have become one of my favorite fabric pieces to re-invent.
They are the perfect material for molding into free-flowing sassy pieces. And boy am I into the sass. You have no idea.


I created my own pattern for this dress by trial and error. (My pattern was made for me, and I am a size two. If you would like to increase the size, a general rule is to add 1/4” all the way around per size increase.)

To Make this Dress, you’ll need:
Four Pattern Pieces (Front Piece #1, Front Piece #2, Back Piece, Middle Piece)
One Large Silk Scarf
Cotton backing fabric the same size as the scarf
Round Tablecloth (mine was 66” in diameter)
20” Zipper
Straight Pins
Scissors
Seam Ripper (If your expertise is anything like mine)
Thread to Match
Sewing Machine

Fold your scarf in half and lay your pattern on top of it. Cut out two ‘back pieces’, two ‘front pieces’ and one middle piece.

Repeat this procedure with the cotton backing fabric.


With the right side of your fabric down, pin the pleats in your two front pieces and iron them flat.
Then pin the two front pieces to your middle piece and sew.
Make sure you sew the neck pieces together as well.


Pin & sew your two ‘back’ pieces to what you had just sewn together.


We are going to repeat this process with your scarf. But since I am a visual learner, I will go ahead and do it all over again for you. With the right side of your scarf fabric down, pin your pleats in the ‘front’ pieces first and iron them flat.
Now, pin your two ‘front’ pieces to your ‘middle’ piece and sew.
Make sure you sew the neck pieces together as well.


Pin & sew your two ‘back’ pieces to what you had just sewn together.
This seems all too familiar….


With right sides of your material together, pin your scarf to your cotton backing material. Sew all of your outside seams together, leaving the bottom open. We will now call this the ‘Top Piece’.


Fold your round tablecloth in half and place it on top of the right side of the material to your Top Piece.
Find the center of your folded tablecloth and pin it to the center of the bottom of your ‘Top Piece’.
Working from the center out, pin the folded tablecloth around the entirety of your top piece. Sew the Top and Bottom pieces together.
I added pleats to my tablecloth ‘Bottom Piece’, just in case I partake of a single scoop of peppermint ice cream in a waffle cone…but you do what you want.


Next comes the zipper. My favorite part. Notice my text is oozing with sarcasm.
I have never liked putting in zippers. I don’t know why…I just don’t.
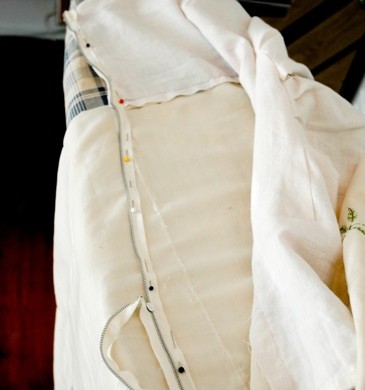
Anywho…fold the right side of your fabric over a quarter of an inch on your Top Piece and pin your zipper on the inside of the material.
Do NOT fold over your material on your Bottom Piece. Pin the zipper directly to the material, leaving the excess to do as it pleases.
Give your Booty some room to breath by fanning the zipper away from the waist until you reach the end of the zipper on the Bottom Piece. (Mine needed an extra 2” from waist to end of zipper.)
Sew your zipper into place on both sides.


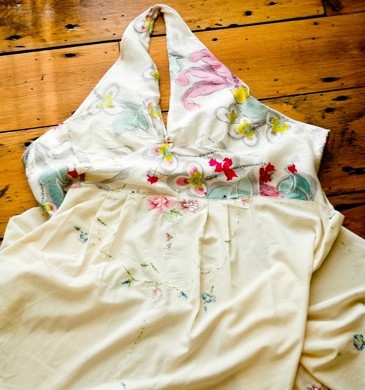
Here is the finished VA-VA-VOOM Vintage Tablecloth Dress.
Mine and the dress’ backside is below.


I can’t wait to wear this little piece out on the town! Now, to convince Biceps we need a night out on the town…..

Read more

Organize My Weirdness, Mr. Bookshelf

Hubby and I enjoy garage sales. In fact, I rubberneck quite often when I see the notoriously illegible sign indicating a sale is happening somewhere in the general area. I think I enjoy seeing other peoples’ craziness on display more than anything.

It makes me feel normal for owning a Metamucil coffee mug.


I made this beauty you see here for only $10. And that’s because I didn’t haggle. The garage sale was benefitting the Boy Scouts. Which I call ‘Boy’s Scouts’. But I also call the big box bookstore ‘Barnes & Nobles’….


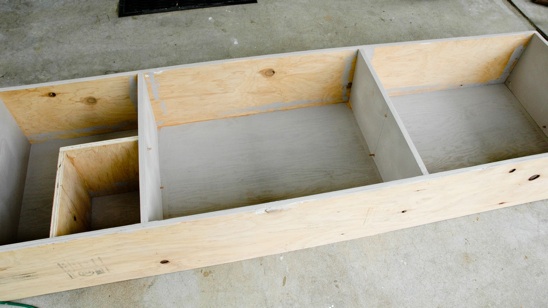
Anywho, my $10 bookshelf looked like this but had been used vertically instead of horizontally. So, take your computer and tilt it 90 degrees. Ok, return your computer to its full and upright position. Thank you for flying with Rebekah.
What you’ll need for this project:
One ugly bookshelf

You’ll also need:
Scrap Plywood for new shelving (if needed)
A 2’ level
Painter’s Caulk and Caulk Gun
Skill Saw
Drill with Phillips drill bit & a drill bit smaller than your wooden
shelving pegs
2” drywall screws
Wooden Pegs to hold in your new shelves
Palm Sander and 80 grit sandpaper (unless your wood is in bad
shape, then you’ll want to start with a 40 grit and work your way
up)
Tape Measure
Speed Square (if you have one)
Hammer & 2” brad nails
Primer, Leftover Oops paint-sassy color preferably…(I had a deep red on hand. Hello, sass!) and a Paintbrush


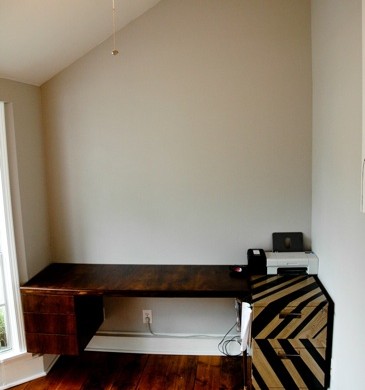
I hoped to fit my shelving right above my desk. I wanted it to basically go wall to wall in my barren office. My new $10 bookshelf was a little too long, so I broke out the skill saw.

Using my tape measure and speed square, I determined the amount I needed to cut off of one side to fit on my wall. I then used my skill saw to cut that sucker down to size. Don’t mess with me, Mr. Bookshelf.


Using my tape measure and speed square, I determined the amount I needed to cut off of one side to fit on my wall. I then used my skill saw to cut that sucker down to size. Don’t mess with me, Mr. Bookshelf.


I decided that I only needed one shelf each for the other two cavities. I determined where I wanted the shelves to sit, and drilled out two holes on each side and then inserted my wooden pegs into the hole, lightly tapping them with a hammer. These pegs will hold up the shelf.
I then took this opportunity to sand down any burrs or rough edges on the shelf.


I caulked up all of the seams within the shelf to make it have that ‘built-in’ look.


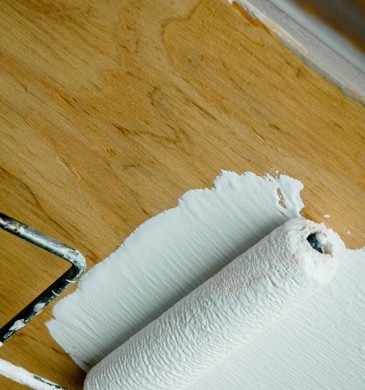
Next came priming and painting. Which was fun considering it was at least 95 degrees at this point.
I love sweating into my paint.


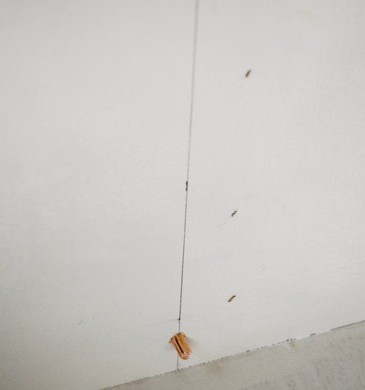
I used my level and my Hubby to hang the new shelf at an appropriate height. We screwed it straight into the wall with drywall screws, hitting the studs. I touched up the screw heads with my Oops red paint.

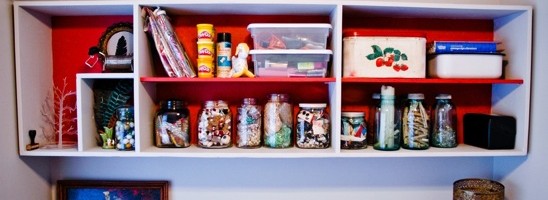
After all was dry, I pulled my aptly named ‘Craft Bin’ from the closet and begin organizing things into jars, bins and tins. Feathers, glitter, glue sticks and beads were flying everywhere.

It was one of the most entertaining nights that Cowboy and I have had in awhile.

PS-Do you think I should add doors to my bookshelf? I can’t decide.

Read more

My Lamp, My Lamp, My Lovely Leftovers Lamp

Check it out!
While Biceps and I were on a romantic date at Habitat for Humanity, I scored a swag light down rod and a trash can cover for $1. He always takes me to the coolest places. I knew I could make something from them, and he couldn’t argue with the price.

You may already know that I have an affinity for log-inspired pieces around my home. (Check out my Mod Log Table). While passing by one of my rent houses, I saw a felled tree and grabbed a chunk of it from an old pal’s front yard. With my two Habitat pieces in hand and now my chunk o’ log, history was about to be made.
Or at least a ‘Lovely Leftovers Lamp’.


Here’s what you’ll need to make your own ‘Lovely Leftover Lamp’.
A drill with a paddle bit (I used a 1”)
Router or a Skill Saw
Belt or Palm Sander with 40 & 80 grit paper
Polyurethane and Foamy Brush
Tape Measure
Chunk o’ Log with the cross-cuts parallel to each other (mine is 3 1/2” tall and 7” in diameter)


You’ll also need:
Trash Can Cover (mine was 8 1/2” in diameter-you could use fancy tin cans, or learn how to make your own Cutey Cans)
Swag Down Rod
Additional Wiring, wire nuts & Switch (if the old wiring is sketchy looking)
Spray Paint that matches your trash can cover
3” Threaded Rods
3/16” Threaded Aluminum Posts


I sprayed my 3” Threaded Rods and 3/16” Threaded Aluminum Posts GOLD to match the rest of my lamp.
These little buggers will attach the trash can cover to the down rod.


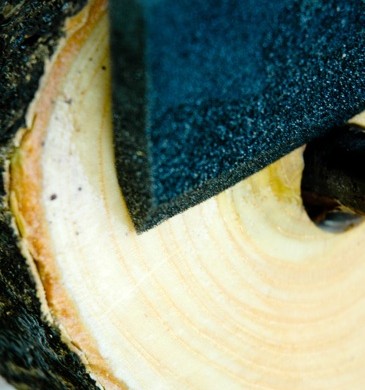
I sanded my log to be baby smooth, starting with a 40 grit and then moving up to an 80 grit.


After your log is smooth on both sides, measure the diameter of your log and mark the center.
Easy enough.


I used a 1” paddle bit to drill through the center of my log which accommodated the 1” diamater of my down rod. Adjust the size of your bit to the size of your down rod.
If your down rod is bigger than 1”, you may need to use a hole saw (which also attaches to your drill).

Drill all the way through, allowing your drill to rest periodically when the bit gets too hot. A hot drill bit and a lot of sawdust tends to have a weird reaction that I like to call ‘Fire’.


Next, we’ll make a channel on the bottom of our log for the wiring to come through.
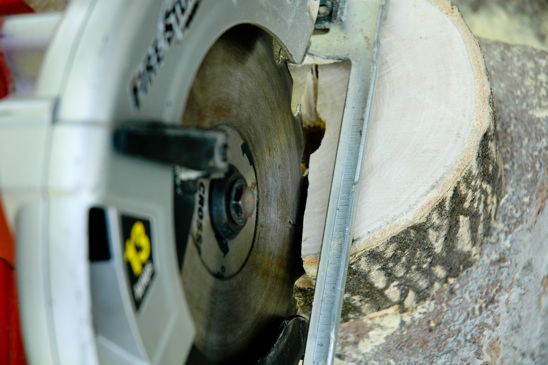
It would be best to use a router, but since I didn’t have one, I went with a skill saw that I depth set to 1”. You aren’t cutting through the whole log, just making a channel for your wiring.


I know this channel for my wiring isn’t that pretty, but since it’s the undercarriage of my log (weird) and I will be covering it with some sort of soft feltiness in the long run, I was alright with it. Now that all of the sanding and cutting is done, wipe off your log thoroughly with a microfiber cloth.


Break out the poly and your foamy brush. Apply a thin layer of poly to your log. Let dry according to your manufacturer’s directions. Once the log is dry, use a steel wool to lightly sand the top and bottom, removing any air bubbles.

Re-apply a second coat if you desire. I usually desire.


I needed a longer run of wire, and decided to tie in some white wire that I had leftover from another project, using two wire nuts that didn’t match and one of which was covered in a sticky substance.
Don’t judge. I’m going for cheap here.


Line up the tips of your exposed copper wire which should be about a 1/4” long, and place the wire nut on top of the two wires (Connect the ribbed wire-it will feel like it has ribs on it, to the other ribbed wire. Connect your smooth wire to your smooth wire).

Screw down the wire nut as far as possible and pull the wires away from the wire nut, making sure they are firmly attached. I used electrical tape around the nuts and wires, just as an added precaution.


Place your down rod through the hole you drilled in your log, feeding the wire through the channel on the bottom of your log. You can cover the bottom of your log with felt or fabric using a hot glue gun.
I know you guys like your glue guns. Get crazy.


I wanted a switch on my lamp, and since they are super easy and cheap, I went for it. I like cheap and easy.
Follow the instructions on the package. It took me less than a minute to do this.


Flip your log over. Attach your trash can cover to your down rod by using your spray painted threaded posts and rods. Feed the 3” threaded rods from the outside in, threading it into the top of the down rod where a globe is usually attached. Use your threaded posts to cap the end of the threaded rods on the outside of your trash can cover. If you have a solid cover, you may need to drill out tiny holes for your threaded rods to go through.

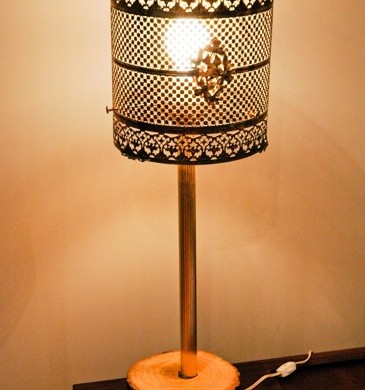
Let’s plug it in!


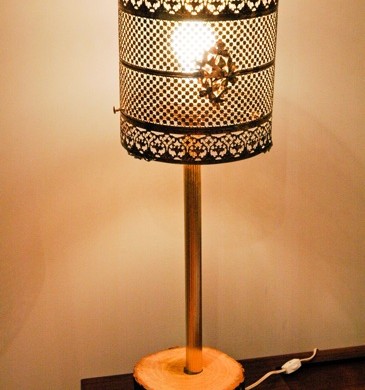
Isn’t it just so purty? I love my new ‘Lovely Leftovers Lamp’!

Read more