Tag Archive for: modern

Snazzy Birdhouses

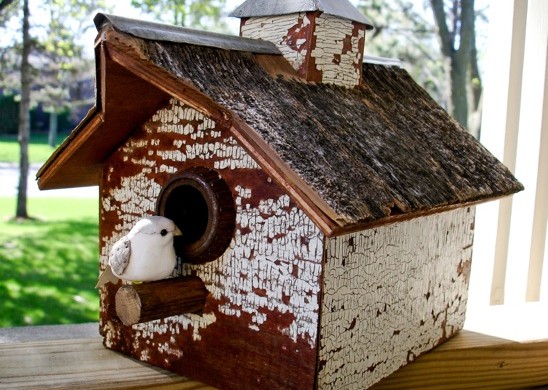
From country style to mod, my in-laws are uber creative when it comes to birdhouses.
And, because they are founding members of ‘EOBHC’-Equal Opportunity Bird House Creators, they consider the most modest sparrow to the showy crow when building their shelters.

This style is for the rustic bird. Fancy parakeets are strongly discouraged.


Social birds tend to flock to this multi-unit. There are martini mixers and a neighborhood association.


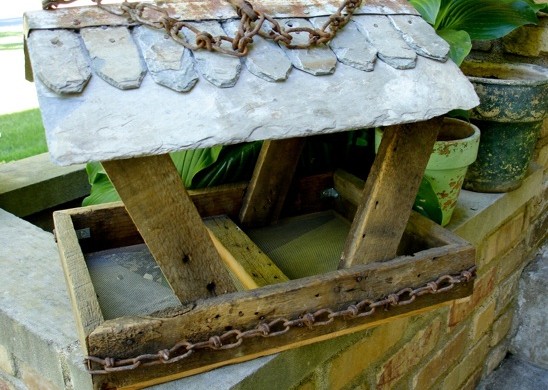
This is a drive-thru feeder. Very important and busy birds fly through here on their way to early morning appointments uptown.


Intended for the sheriff bird and his growing family. He has been employed to keep the naughty blue jays at bay.


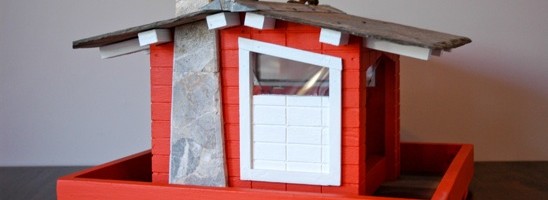
And finally, this was made for the modern bird. Both functional and architecturally pleasing, this birdhouse captures the style of today with a bit of a nod to yesterday.
Watch out Trump. My in-laws have cornered the market on bird real estate…

Read more

Mod Log Table

I have been dreaming of an outdoor end table for quite some time. When my neighbor decided to chop down his very dead pine tree, the opportunity afforded itself.
I love neighbors with chainsaws.
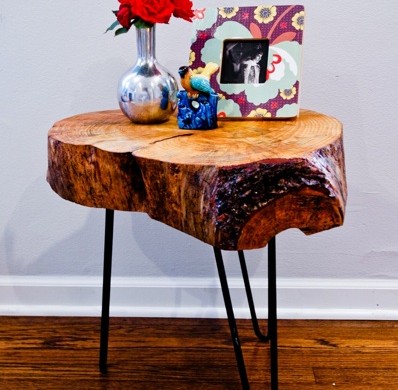
Here’s a view of the finished Mod Log Table. Yes, it’s inside my house. No, it hasn’t spent a day outside yet. I think it’s kind’ve pretty inside…


In order to make your own Mod Log Table, you’ll need a dead tree-preferably very dead. I hopped the fence into my neighbors yard and picked out my victim from amongst the carnage laying before me.


I let my Little Mini chainsaw rest while I borrowed the neighbor’s beefier chainsaw. I tried to make the cut as even as possible, knowing I would have to sand down any high points on the wood later on.


I had some vintage legs laying around, but you can use pre-made legs that you can buy at Lowe’s. You’ll also want lag screws to fasten your legs to the log, polyurethane, a foamy brush, and gloves. You’ll want some steel wool & a microfiber cloth for in between your poly layers.


You’ll need a drill with a drill bit slightly smaller than your lag screw and a belt sander with 40 & 80 grit sandpaper, a socket set and a level(not pictured-sorry!).


Sand the top and bottom of your log until it’s smooth, starting with the 40 grit. Use the 80 grit for your fine sand.
That’s fine, baby, that’s fine….


Once your log is smooth, use small set screws to temporarily attach the legs to the underside of the log. Outline the table legs (so when you remove them later on, you’ll know where they go) and flip your table over to check for it being level.
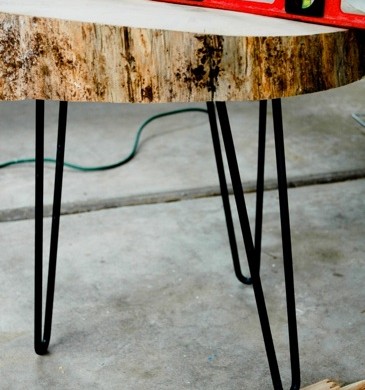

Using your level as shown, ‘shim’ up your table leg until the table sits level. Measure the amount you will either need to router out of the underside of your table, or shim up with scrap plywood.
Or you can choose to sand it even more until your shoulder falls off.
Flip your table back over and remove the legs.


I cut out pieces of plywood with a jigsaw to make up the difference I had measured earlier in order for the table to be level. I chose to shim up my legs, mainly because I do not own a router. This doesn’t look quite as finished, but for an outside table, I was ok with it.


Drill pilot holes for your lag screws or for your pre-made table legs using a drill bit that is slightly smaller than the screw you’ll be using.


Use a socket set to insert your lag screws, if you have legs like mine (tee hee). If you have pre-made legs with the screw already sticking out of the end, just screw them into where you drilled your pilot holes.


Wipe the table down with a microfiber cloth-get all the nooks and crannies. Now it’s time to make it pretty! Enough of the functional stuff. WOO-HOO!


Apply your first layer of polyurethane and let dry according to the manufacturer’s instructions. It’ll be so purty when you’re done with the first layer!


Use your steel wool to get any of the bubbles out by ‘sanding’ it lightly.


Use your steel wool to get any of the bubbles out by ‘sanding’ it lightly.
Wipe the entire thing down again with your microfiber cloth. Apply another coat of poly and let dry.
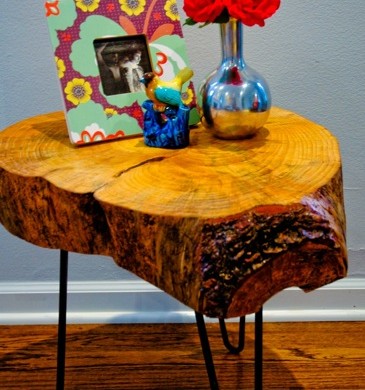

You now have such a cute table, you may not be able to bring yourself to put it outside. Mine hasn’t made it outside yet. I keep telling myself to let go…but I’m worried it will be lonely outside…
Read more

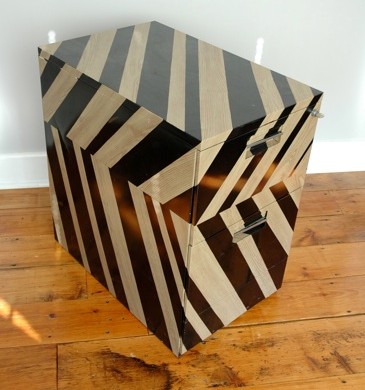
Mod Filing Cabinet

I was tired of the clunky metal object mocking me from the rest of my very ‘cool’ office.

I was inspired by something similar in a Ready Made magazine (now defunct) and just had to try it on my own, of course putting my own little spin on it.


What you will need:
Filing Cabinet-I picked mine up from craigslist for $15
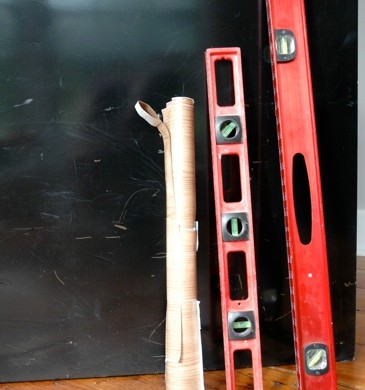
Contact Paper-I chose a wood grain birch (found at Lowe’s)
2’ or 4’ level
Exacto Knife/Scissors
Pencil


Using your level, draw a straight line across the middle of your filing cabinet. This will be the end point for your contact paper. I chose to put the line about a third of the way down of the filing cabinet, instead of a predictable half-way mark, just to make things interesting. I don’t like to be predictable…


Using your level, draw lines at 3”, 2” and 1” of thickness onto the contact paper to make the stripes. The angle you choose to have your contact paper at on the filing cabinet and the depth of your cabinet will dictate how long your strips need to be. Cut your differing width of stripes from the contact paper, overcompensating for the length.


I temporarily taped all of my stripes to the side of the filing cabinet, and adjusted them until I liked the look of them, before permanently adhering them to the cabinet. I have learned to do this the hard way. Let’s just say it is very difficult to remove contact paper from anything. Next, I drew little ‘tick’ marks onto the filing cabinet, notating where each stripe went, so I would remember in what order to adhere them to the cabinet.


Using a level, draw a line across the bottom of your taped contact paper stripes that coincides with the line you had originally drawn on the actual filing cabinet. This will make the bottom angle on your stripes. Remove your stripes and cut the tips off with your exacto knife or a pair of scissors.


Peel off the backing from your strips and began to place the stripes onto the filing cabinet, following your earlier notations. Smooth out the bubbles as you go.


Use your exacto knife to cut the top of your stripe off, leaving about an 1/8” to wrap around to the other side.


Repeat this process around the entire filing cabinet. If you have recessed pulls like I did, cut your stripes extra long in order to tuck the contact paper up and around your pulls. When placing the stripes on the drawers, cut them extra long in order to wrap around the edges of each drawer.


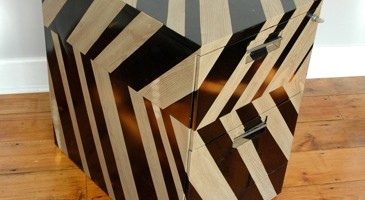
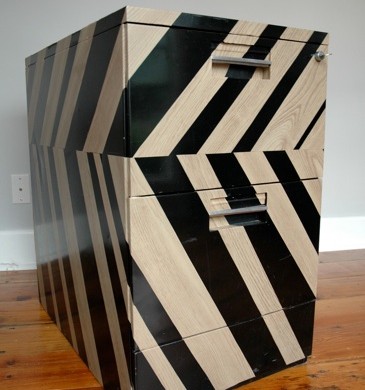
Now you have a ‘very cool’ filing cabinet! No more mocking us, Mr. Clunky Filing Cabinet!

Read more

Mod Log Table

I have been dreaming of an outdoor end table for quite some time. When my neighbor decided to chop down his very dead pine tree, the opportunity afforded itself.
I love neighbors with chainsaws.
Here’s a view of the finished Mod Log Table. Yes, it’s inside my house. No, it hasn’t spent a day outside yet. I think it’s kind’ve pretty inside…


In order to make your own Mod Log Table, you’ll need a dead tree-preferably very dead. I hopped the fence into my neighbors yard and picked out my victim from amongst the carnage laying before me.


I let my Little Mini chainsaw rest while I borrowed the neighbor’s beefier chainsaw. I tried to make the cut as even as possible, knowing I would have to sand down any high points on the wood later on.


I had some vintage legs laying around, but you can use pre-made legs that you can buy at Lowe’s. You’ll also want lag screws to fasten your legs to the log, polyurethane, a foamy brush, and gloves. You’ll want some steel wool & a microfiber cloth for in between your poly layers.


You’ll need a drill with a drill bit slightly smaller than your lag screw and a belt sander with 40 & 80 grit sandpaper, a socket set and a level(not pictured-sorry!).


Sand the top and bottom of your log until it’s smooth, starting with the 40 grit. Use the 80 grit for your fine sand.
That’s fine, baby, that’s fine….


Once your log is smooth, use small set screws to temporarily attach the legs to the underside of the log. Outline the table legs (so when you remove them later on, you’ll know where they go) and flip your table over to check for it being level.


Using your level as shown, ‘shim’ up your table leg until the table sits level. Measure the amount you will either need to router out of the underside of your table, or shim up with scrap plywood.
Or you can choose to sand it even more until your shoulder falls off.
Flip your table back over and remove the legs.


I cut out pieces of plywood with a jigsaw to make up the difference I had measured earlier in order for the table to be level. I chose to shim up my legs, mainly because I do not own a router. This doesn’t look quite as finished, but for an outside table, I was ok with it.


Drill pilot holes for your lag screws or for your pre-made table legs using a drill bit that is slightly smaller than the screw you’ll be using.


Use a socket set to insert your lag screws, if you have legs like mine (tee hee). If you have pre-made legs with the screw already sticking out of the end, just screw them into where you drilled your pilot holes.


Wipe the table down with a microfiber cloth-get all the nooks and crannies. Now it’s time to make it pretty! Enough of the functional stuff. WOO-HOO!


Apply your first layer of polyurethane and let dry according to the manufacturer’s instructions. It’ll be so purty when you’re done with the first layer!


Use your steel wool to get any of the bubbles out by ‘sanding’ it lightly.


Use your steel wool to get any of the bubbles out by ‘sanding’ it lightly.
Wipe the entire thing down again with your microfiber cloth. Apply another coat of poly and let dry.


You now have such a cute table, you may not be able to bring yourself to put it outside. Mine hasn’t made it outside yet. I keep telling myself to let go…but I’m worried it will be lonely outside…
Read more