Author Archive for:Rebekah

Men Make Such a Difference

My Father was the man that told me stories every night, held me when I cried, and who could barely spank me when I was naughty. (Which was often).

He taught me that a man worth having…was a man worth waiting for.


He took us kids on bike rides, crafted stilts out of leftover wood and created ‘treasure hunts’ for our birthdays.


He’ll still be silly with us and has never embarrassed by us.


He is reliable, consistent, honest…


…and a little weird.
Mom says that’s where I get it from.


He is the best earthly example I have seen of what my Heavenly Father must be like.
Except I picture God with flowing hair. My Dad has never had flowing hair. I believe he came out of the womb with his current hairdo.
Anywho, thank you Daddy, for showing me what it means to live a godly and moral life.
I love you more than you’ll ever know. Happy Father’s Day!

Read more

Hue, Saturation and Lens Flare

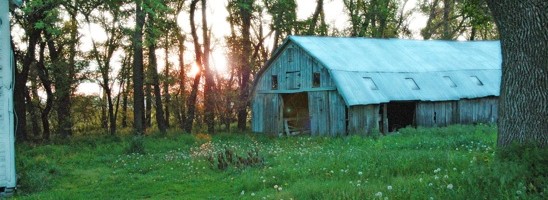
Serenity oozed out of this photo. It is peaceful, allowing me to reminisce about the farm.
However, I wanted to spruce it up a little.

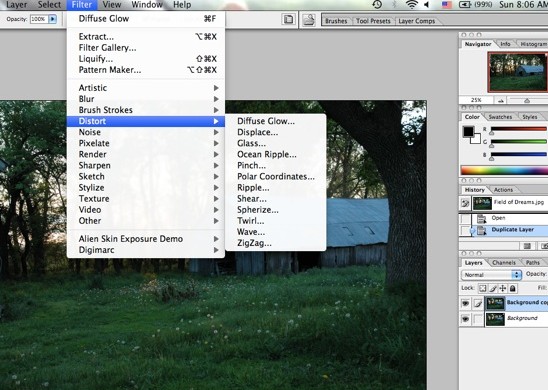
After making a copy, I wanted to add a little Diffuse Glow.


Under the Filter Tab, I scrolled down to Distort and then over to Diffuse Glow. I adjusted the amount of graininess to 4%, glow to 7% and clear amount to 12%.


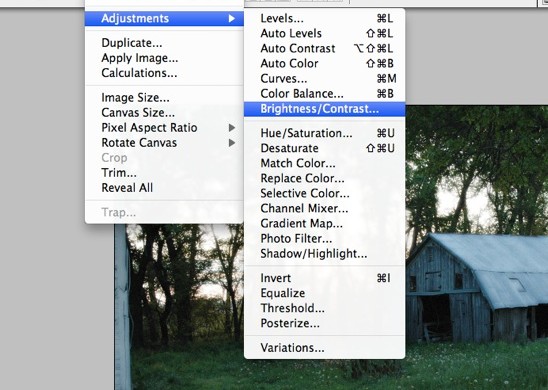
I clicked on the Image tab and scrolled down to Adjustments, then over to Brightness/Contrast.


I used the sliders to increase both the Brightness and the Contrast.


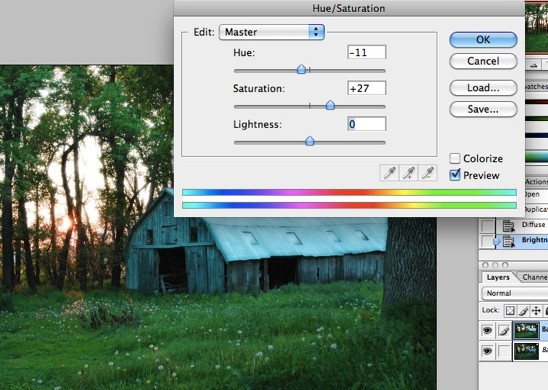
I wanted the grass to pop a little more. Clicking on the Image tab again, I scrolled down to Adjustments and then over to Hue/Saturation.


I used the sliders to increase the saturation and decrease the hue. This brought out a depth in the green grass that made me happy. I smiled from ear to ear, that’s how happy I was.


I wanted the photo to have a little something special, however.
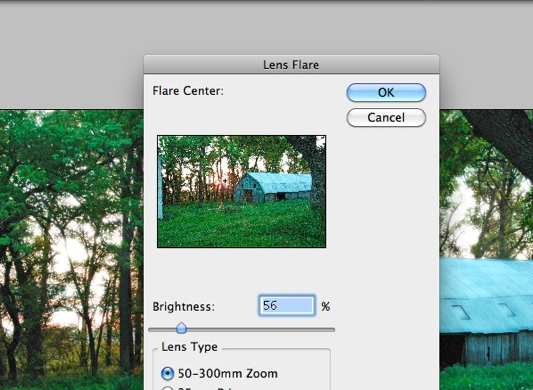
Opening the Filter tab, I scrolled down to Render and then over to Lens Flare.
I tried all of the different ‘Lens Types’, choosing to go with the 50-300 mm Zoom. I chose a brightness of 56% which wouldn’t allow the Lens Flare to overpower the photo.


Here’s the final photo all spruced up. And below is what I started with.

Read more

My Lamp, My Lamp, My Lovely Leftovers Lamp

Check it out!
While Biceps and I were on a romantic date at Habitat for Humanity, I scored a swag light down rod and a trash can cover for $1. He always takes me to the coolest places. I knew I could make something from them, and he couldn’t argue with the price.
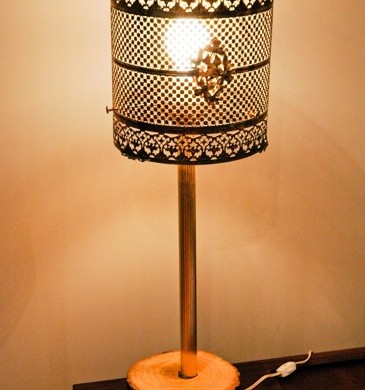
You may already know that I have an affinity for log-inspired pieces around my home. (Check out my Mod Log Table). While passing by one of my rent houses, I saw a felled tree and grabbed a chunk of it from an old pal’s front yard. With my two Habitat pieces in hand and now my chunk o’ log, history was about to be made.
Or at least a ‘Lovely Leftovers Lamp’.


Here’s what you’ll need to make your own ‘Lovely Leftover Lamp’.
A drill with a paddle bit (I used a 1”)
Router or a Skill Saw
Belt or Palm Sander with 40 & 80 grit paper
Polyurethane and Foamy Brush
Tape Measure
Chunk o’ Log with the cross-cuts parallel to each other (mine is 3 1/2” tall and 7” in diameter)


You’ll also need:
Trash Can Cover (mine was 8 1/2” in diameter-you could use fancy tin cans, or learn how to make your own Cutey Cans)
Swag Down Rod
Additional Wiring, wire nuts & Switch (if the old wiring is sketchy looking)
Spray Paint that matches your trash can cover
3” Threaded Rods
3/16” Threaded Aluminum Posts


I sprayed my 3” Threaded Rods and 3/16” Threaded Aluminum Posts GOLD to match the rest of my lamp.
These little buggers will attach the trash can cover to the down rod.


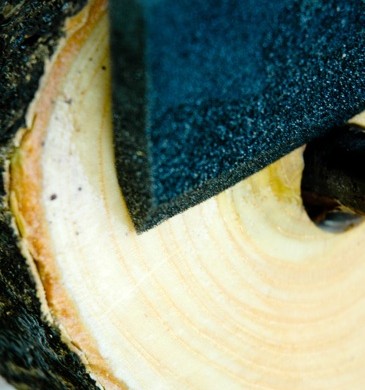
I sanded my log to be baby smooth, starting with a 40 grit and then moving up to an 80 grit.


After your log is smooth on both sides, measure the diameter of your log and mark the center.
Easy enough.


I used a 1” paddle bit to drill through the center of my log which accommodated the 1” diamater of my down rod. Adjust the size of your bit to the size of your down rod.
If your down rod is bigger than 1”, you may need to use a hole saw (which also attaches to your drill).

Drill all the way through, allowing your drill to rest periodically when the bit gets too hot. A hot drill bit and a lot of sawdust tends to have a weird reaction that I like to call ‘Fire’.
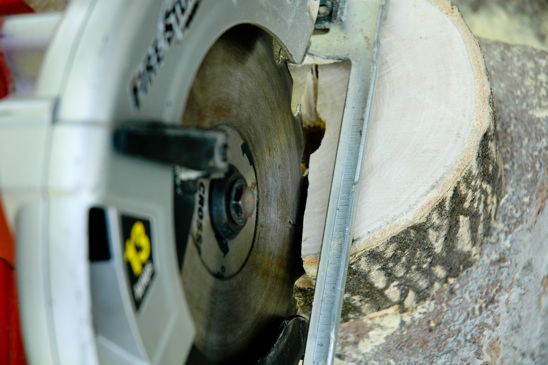

Next, we’ll make a channel on the bottom of our log for the wiring to come through.
It would be best to use a router, but since I didn’t have one, I went with a skill saw that I depth set to 1”. You aren’t cutting through the whole log, just making a channel for your wiring.


I know this channel for my wiring isn’t that pretty, but since it’s the undercarriage of my log (weird) and I will be covering it with some sort of soft feltiness in the long run, I was alright with it. Now that all of the sanding and cutting is done, wipe off your log thoroughly with a microfiber cloth.

Break out the poly and your foamy brush. Apply a thin layer of poly to your log. Let dry according to your manufacturer’s directions. Once the log is dry, use a steel wool to lightly sand the top and bottom, removing any air bubbles.

Re-apply a second coat if you desire. I usually desire.


I needed a longer run of wire, and decided to tie in some white wire that I had leftover from another project, using two wire nuts that didn’t match and one of which was covered in a sticky substance.
Don’t judge. I’m going for cheap here.


Line up the tips of your exposed copper wire which should be about a 1/4” long, and place the wire nut on top of the two wires (Connect the ribbed wire-it will feel like it has ribs on it, to the other ribbed wire. Connect your smooth wire to your smooth wire).

Screw down the wire nut as far as possible and pull the wires away from the wire nut, making sure they are firmly attached. I used electrical tape around the nuts and wires, just as an added precaution.


Place your down rod through the hole you drilled in your log, feeding the wire through the channel on the bottom of your log. You can cover the bottom of your log with felt or fabric using a hot glue gun.
I know you guys like your glue guns. Get crazy.


I wanted a switch on my lamp, and since they are super easy and cheap, I went for it. I like cheap and easy.
Follow the instructions on the package. It took me less than a minute to do this.


Flip your log over. Attach your trash can cover to your down rod by using your spray painted threaded posts and rods. Feed the 3” threaded rods from the outside in, threading it into the top of the down rod where a globe is usually attached. Use your threaded posts to cap the end of the threaded rods on the outside of your trash can cover. If you have a solid cover, you may need to drill out tiny holes for your threaded rods to go through.

Let’s plug it in!
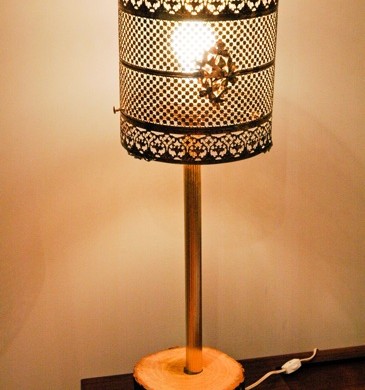

Isn’t it just so purty? I love my new ‘Lovely Leftovers Lamp’!

Read more

Le Mansion Next Door & Le Storm

You might have seen the craziness of Biceps and I pouring our neighbor’s new concrete steps.
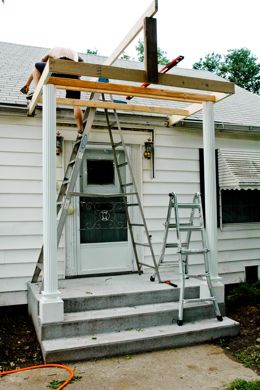
For the last several days, Biceps and I have been strapping on our tool belts to build that same neighbor an overhang to match her beautiful new steps.

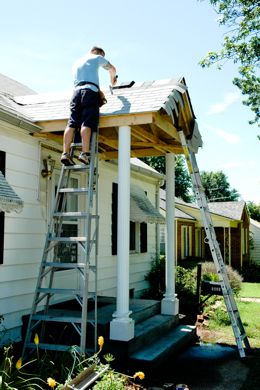
You can see Biceps half on the ladder, half on the roof making measurements and solving riddles on how to tie on the rafters.
I am down below sipping water and documenting things.
I needed a break.


This purty columns rests on a cinder block which we filled with concrete and then wrapped in 3/4” plywood.
Those suckers ain’t goin’ nowheres. (Okie talk).
They aren’t painted yet, so don’t get your shorts in a bunch. They’ll look much better when finished completely.
Our neighbor said her home was starting to feel like a mansion. How cute is that?


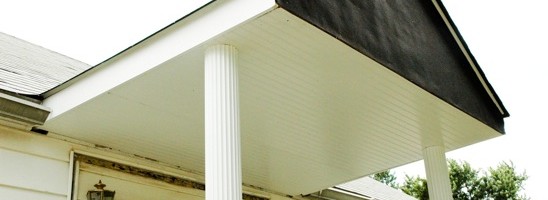
After installing all of the rafters, cross bracing systems and the spine board, we decked the top with 3/4” plywood and then covered it all up in tar paper. This took way too long and I have way too many bruises from this process.


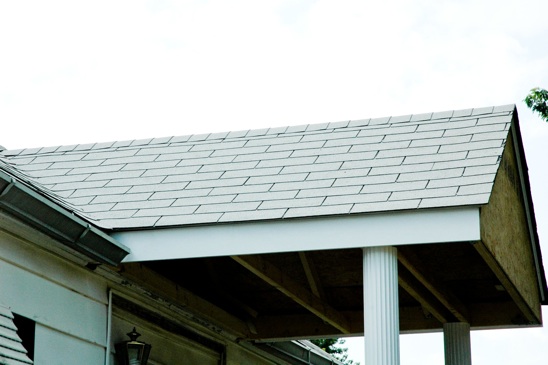
Next came the horrible day of shingling the roof. By the end of the day, I had roofing tar stuck under my fingernails, on my face and somehow in my ears.
Did I take a nap on the hot roof? Who knows, the hot sun makes me do strange things from time to time.


I added some facia to attach the gutters to. I cried when my second board came up too short.
I had even done the ‘measure twice, cut once’ routine.
What is the matter with me? Too much tar in my system is my excuse.


We added tar paper to the front of the overhang, although it didn’t really need it. We’ll put vinyl siding on the face of it soon. But, we heard a storm was a ‘brewin and wanted to take extra precaution to keep the entire thing dry.
And thank God for Biceps’ biceps. He had to manually lift up this entire overhang with a 2×6 while I stood on a ladder and slid the wainscoting over the pillar tops.
I kept making references to Samson, but somehow he didn’t find them funny at the time.
We nailed all of the wainscoting in place, and not a moment too soon.


I felt a drip and then another.
‘I hope it’ll blow over’, I tell Biceps. ‘I want to get this thing done!’


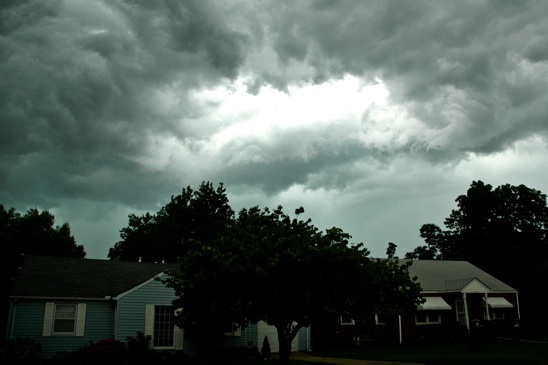
However, the sky in a matter of seconds turned into this.
We made a mad dash to pick up all of our tools.


The wind picked up speed. The trees rustled. The kitties hid.


It looks like the sky is about to swallow up my neighbors.
Run Lee and Ina! Run!

At about this moment, I decided maybe I should head inside and give up my hopes of this storm ‘blowing over’.
And force myself instead to enjoy a nice cup of coffee and a shower.
It was a tough decision, let me tell you.

Read more