Tag Archive for: DIY

DiY Recycled and Cheap Rain Barrel

Taking on the responsibility of gardening this year brought about several financial questions that Biceps and I had to discuss.

One-How can I garden with my cost being minimal while also yielding the best produce?

Two-What kind of cute garden accoutrements can a girl justify buying in order to really enjoy the gardening experience, i.e. pea green garden clogs, flowery leather gloves, etc.?

Our first experiment was making our very own and very cheap “DIY Spinning Composter”.
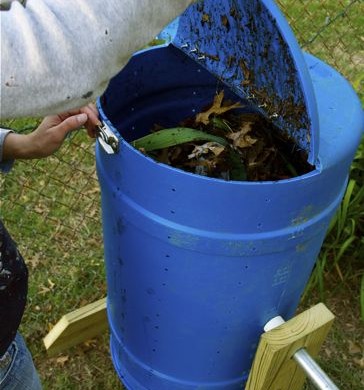
It took a couple of hours and a couple of bucks, and voila-rich, lovely compost. Mmmm….
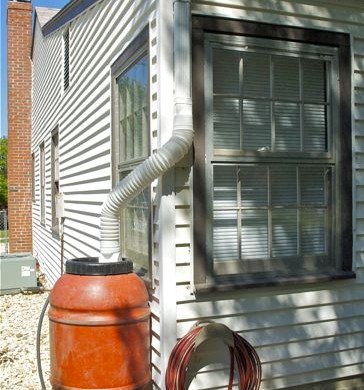
 

Our next experiment was making our very own DiY Rain Barrel.
Did you know that with only ONE INCH of rain, a 1,000 sq. ft. roof will produce 600 gallons of water? What the heck! We decided to make two rain barrels for the back of our house. If I had my way, they’d be surrounding the house….
(Of course, there are many stores that sell rain barrels-but that seemed too easy. Plus the price tag of $80-$300+, made most of them outside of our “cheap” budget.)
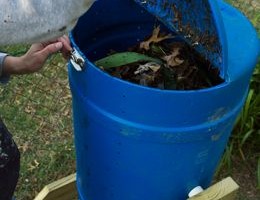
We started off by buying a recycled pepper barrel from Atwoods for $35.
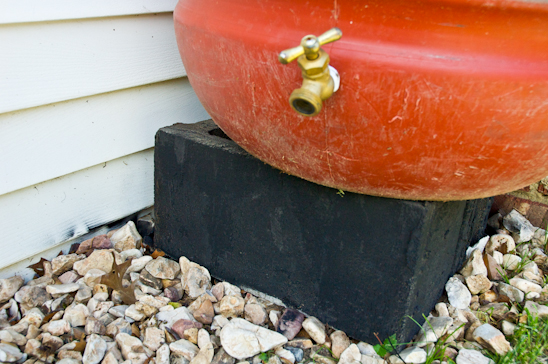
 

It came complete with a spigot…
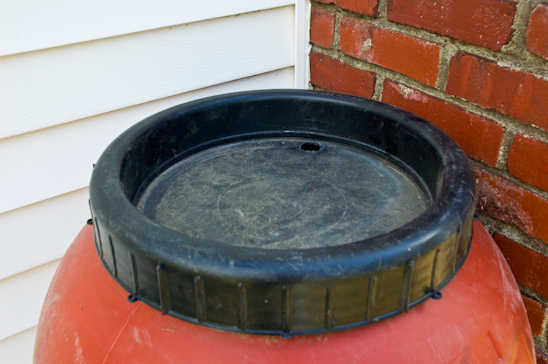
 

…a lid that screwed on and a bonus-it’s very own peppery smell.
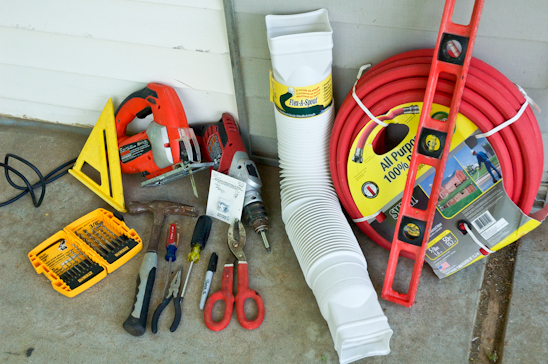
 

And the rest of the necessary items needed we purchased for less than $10.
Here’s what you’ll need to make your very own rain barrel:
Drill and drill bits
Hammer
Metal Cutting Shears
Jig Saw with wood blade
Phillips & Flathead Screwdrivers
2′ or 4′ Level
Old window screen
Hose (Buy a new one, recycle an old one)
Flex-A-Spout (Lowe’s, Atwoods, Home Depot)
(4 ish) White sheet metal screws for gutters (Lowe’s, Atwoods, Home Depot)
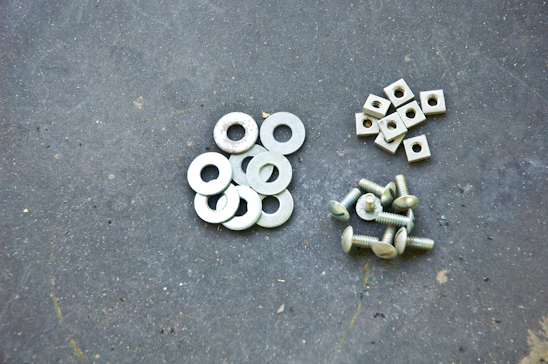
 

…1″ Bolts with washers and nuts (we have a coffee can full of these, but if you must purchase them, you might spend $1-2)
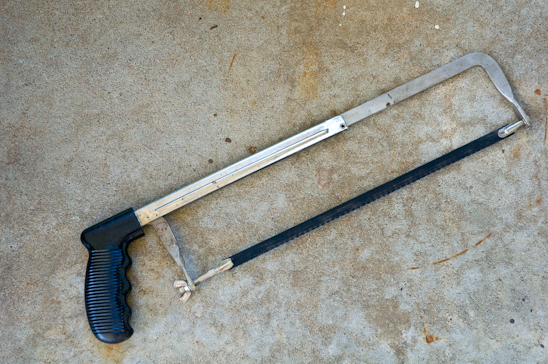
 

…and a Hand Saw with metal blade


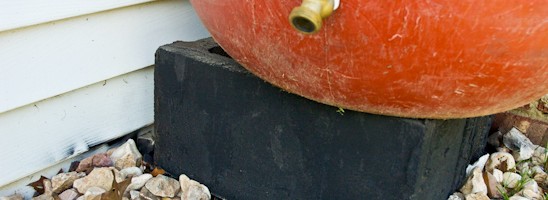
We raised our rain barrel up 6″ in order to have gravity take control of the water flow. If you are placing your rain barrel on a slope and watering below, you can skip this step. I would recommend raising it as high as you can safely-(NOTE:1 gallon of water weighs about 8.35 lbs, so a 55 gallon barrel full of water weighs approximately 460 lbs.).
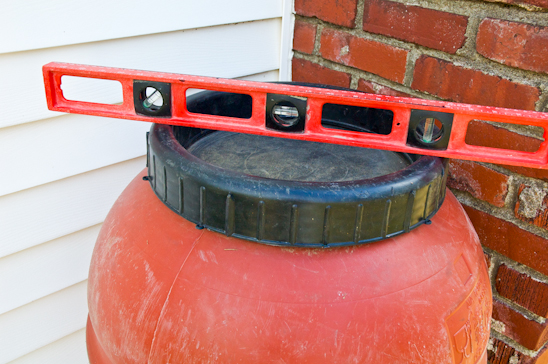
 

Level the barrel to avoid any topsy-turvy action.
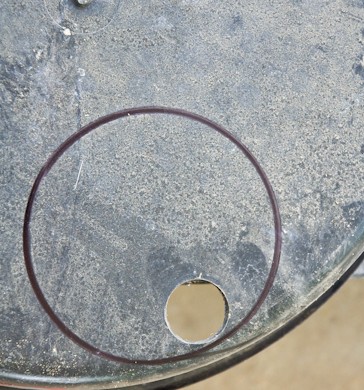
 

The first step was to trace where I would cut a hole (I used my coffee can) in the lid to allow the water to flow from the downspout and into the barrel.
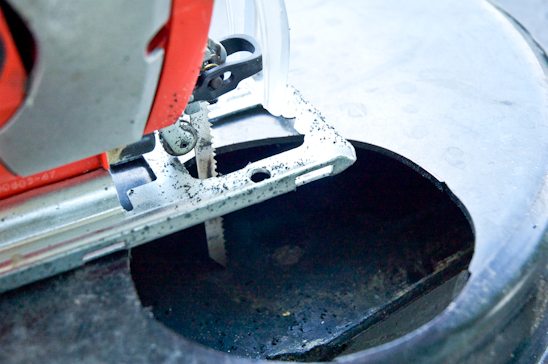
 

Using my jig saw, I cut out the traced circle.
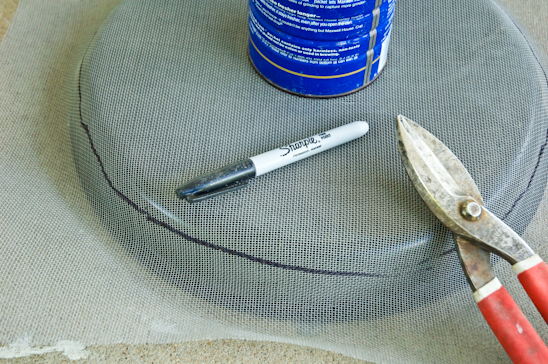
 

Next, I cut out a circle of screen with my metal cutting sheers to cover the entire top of the lid. The screen will catch tree limbs, nuts, and roof debris before it enters the barrel.


I pre-drilled five holes around the top of the lid. This is where the bolts will go to hold down the screen.


I laid the cut screen on the top of the lid and pierced through the screen with a hammer and a nail, into the pre-drilled holes. This will allow the bolts to go through easily.
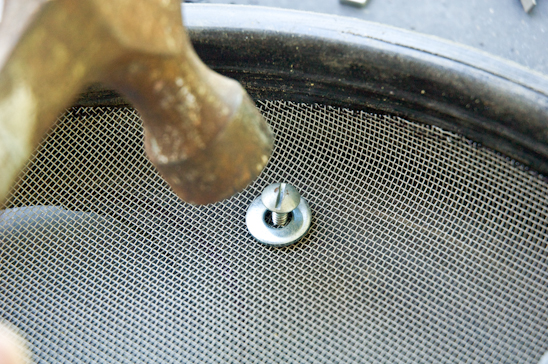
 

The bolts and washers came next. I pounded the bolts through the pierced and pre-drilled holes in the screen. On the underside of the lid, I tightened the bolts by adding nuts.
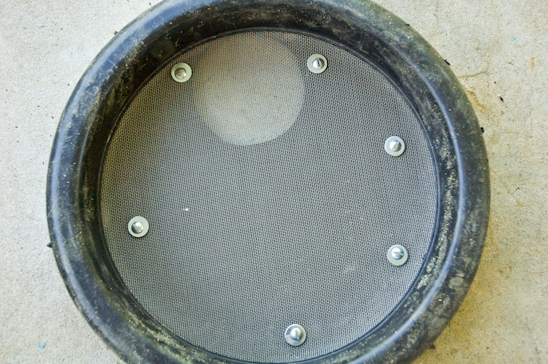
 

Here’s what my finished lid looked like.
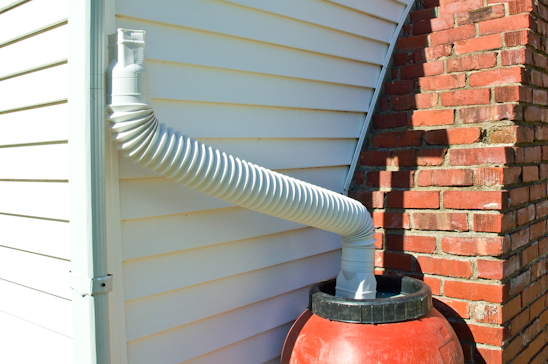
 

Next, I determined where my Flex-A-Spout would need to attach to my gutters while still reaching my barrel.
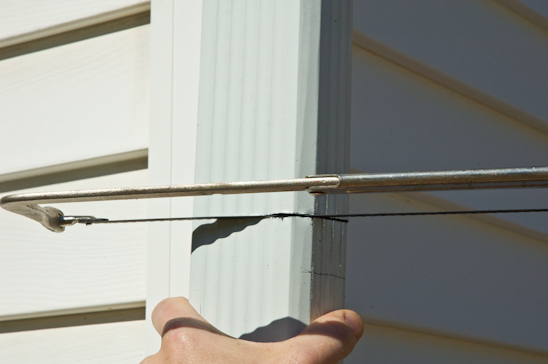
 

After marking on my existing downspout where the cut would be made, I got to work with the hand saw.
To be honest, Biceps is cutting so that I can take the picture.
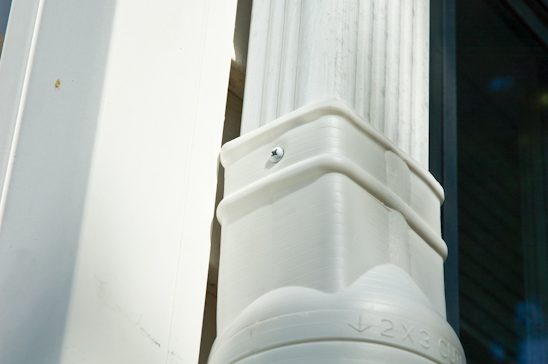
 

I pre-drilled through my Flex-A-Spout and into the existing downspout before adding the white sheet metal screws on all four sides, cinching the two spouts together in perfect harmony.
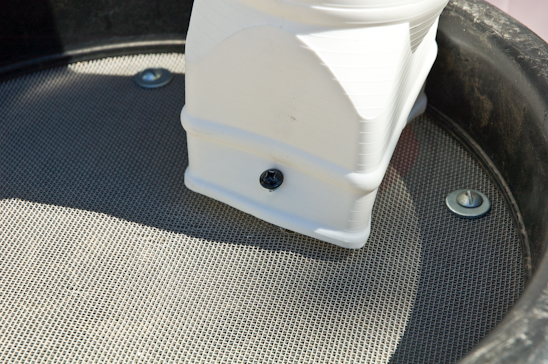
 

For good measure, I screwed the end of the downspout into the rain barrel lid with a 3″ exterior screw. I didn’t want it to be flopping around during a high wind and embarrassing itself.


I would recommend drilling out a large hole at the top of the barrel for overflow. I even attached a hose to this in order to feed the overflowing water into another barrel or trashcan during an intense rain.
Attach the hose to the spigot, and voila-you are done!

Now you don’t have to freak out each time you want to water your garden or fill up your bird bath. Or maybe you weren’t freaking out, but still would like to have a rain barrel.

Either way, it’s win-win.
Read more

DIY Spinning Composter

This year was my first year for a full-fledged garden. I consider it full-fledged because it produced enough to not only feed Biceps and I, but it also allowed me to dehydrate, freeze and give-away the excess.

To be honest, I was just happy that anything sprouted from the earth.

I give props to the composted kitchen and yard waste that we added to the soil-this garden seemed to outperform many of my neighbors’ gardens.
And just in case you don’t want to go spend your hard earned dollars buying a fancy composter in excess of $100 bucks or more, I thought I would show you how to make your own using some recycled and some store bought materials for about $30 in a matter of hours.

(Here’s my video for my DIY Spinning Composter.)


Here’s what you’ll need for your very own composter (The store bought materials can all be found at Lowe’s):

Food Safe Barrel of some sort (I used a leftover crazy person’s 40ish gallon Y2K water barrel they had in their basement in preparation for the end of the world)
3″ ABS toilet flange (I used an Oatey brand for $3.60)
3″ PVC pipe (I bought a 10′ stick-that’s the smallest they had for $10)
3″ PVC cap ($.72)
(2) 2 x 6 x 10 pressure treated lumber (~10′ for $6.97) and pressure treated wood screws (about 20 or so)
(2) hinges with appropriate sized bolts and nuts-don’t use the screws in the package that comes with them (Gatehouse brand 3 1/2″ Butt/Mortise hinges for $2.78 each)
(1) window sash latch with appropriate sized bolts and nuts-don’t use the screws in the package that comes with them (Gatehouse brand for $3.59)
(1) galvanized pipe (I re-purposed a closet rod-1″ diameter and about 4′ length, but if you have to buy one, they are about $5-7)
(8) wood screws 1 1/2″ ish (I used leftovers found in my coffee can full of excess screw, but you may spend $.50)


Here are the tools you will need to complete the project:

Square
Skill Saw with wood blade
Drill with 5/16″ drill bit, hole saw slightly bigger than your galvanized pipe/closet rod
Fine grit sandpaper
Chop Saw
Old screen from window
Tins Snips to cut screen
Flat head & Phillips head screwdriver
Hammer

Let’s get started!


Determine which end is up for you and your barrel. On your “up” end, use your skill saw to cut out a lid in a semi-circle shape (half of the entire circle).


This is what the lid will look like when you are done cutting it out. Sand off any burrs.


Pre-drill the holes for the hinges and the latch. Sand off any burrs. Attach the hardware, using the bolts and nuts (bolts on the outside, nuts inside).


Attach the hole saw to your drill and measure halfway down on each side of your barrel, starting on either side of the lid. The holes should be drilled so that the closet rod will run parallel to the lid. Sand off any burrs.


Drill holes for your closet rod to go through. Insert the closet rod to make sure the barrel can be easily turned. If not, increase the diameter of the hole slightly.


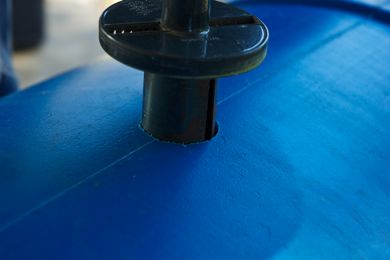
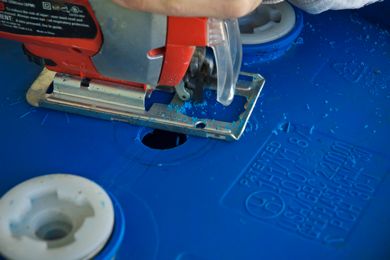
On the bottom of your barrel, trace the 3″ opening for the toilet flange using a sharpee in the center. Cut out the circle with your skill saw and wood blade. Sand off any burrs.


Insert the toilet flange to the outside of the barrel and make sure it fits snugly.


Cut out enough screen to cover the bottom of the opening in the flange. Pre-drill holes in order to screw the flange to the barrel and the screen to the flange.


Remove the closet rod from the barrel and place the PVC pipe vertically in the barrel, fitting it over the toilet flange. Cut the 3″ PVC pipe to fit vertically inside of your barrel, leaving about 6″ headspace between the top of the pipe and the opening of the composter. Place the 3″ cap on top of the pipe.
Mark where the curtain rod will meet with the PVC pipe.


Using your drill with the 5/16″ bit, drill holes several inches apart in the PVC pipe. Using the hole saw, drill two holes in the PVC pipe for the curtain rod to go through.


Using the same 5/16″ drill bit, drill holes vertically in the barrel, about 2″ apart vertically and 6″ apart horizontally.


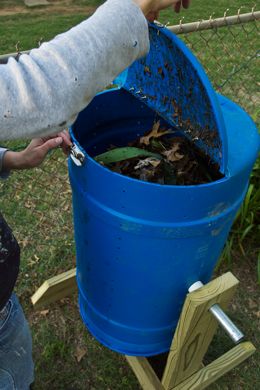
Cut two identical “legs” for the composter using your chop saw and the pressure treated wood. Begin by measuring from the side of the barrel to center, adding 1 foot to the measurement. For each “leg”, measure 2″ down from one of the cut ends, center the hole saw to cut a circle for the curtain rod to go through.


Cut four identical lengths of wood (mine were about 2′ each in length) to secure the legs to. Attach with the pressure treated wood screws as you see here. I got fancy and cut the corners off of the base pieces. You don’t have to, it doesn’t affect the functionality of the composter.


I added spacers in between the pressure treated wood and the barrel to keep the curtain rod in place. They were just bits of pvc pipe that fit around the curtain rod, cut to about 2″ in length.


Give it a spin and see how much fun making your own compost will be.
Begin collecting all of your kitchen scraps: veggie/fruit peels and scraps, egg shells, coffee filters & grounds, etc (no meat, eggs or dairy) and throw it all in your barrel with dried leaves, grass and yard waste with a ratio of 1 (kitchen waste) to 2 (yard waste). Turn the barrel once a week and keep it as moist as a damp sponge by adding water when needed. (I save old coffee, rinse/rain water, etc. to moisten up the compost).


It’s ready to be used in the garden when the compost smells like heavenly dirt and is black and crumbly. Your plants will thank you so much for this yummy concoction…

Read more

Vintage Stereo Cabinet Redux

Biceps and I enjoy working out.
What I don’t enjoy are the ugly weights and yoga mats lying around my house. We don’t have a workout room where I can tuck all this away and shut the door.

I needed a solution for this debacle. I found said solution at Habitat for Humanity for $10 bucks. But, it needed a lot of work.($10 has seemed to be the magic number for me lately-that’s what my sewing cabinet cost, too!)


Picture in your cute little mind these being a pumpkin orange and the wood covered in gunk, spider eggs and stickers. I didn’t take a before picture, darn it, because I was too gung ho to get the project started and forgot to pull out the camera.
Forgive me, dear one. Forgive me.


The sides of the cabinet housed the speakers. We gutted the entire thing, removing the side walls that separated the speakers from where the record player sat, the speakers, the electrical components…the whole she-bang. This is also when I found the spider eggs. I almost had a panic attack


After gutting it, we installed 3/4” plywood to beef up the bottom and close up the backside.


Check that backside out. You like it, don’t you? I thought so.


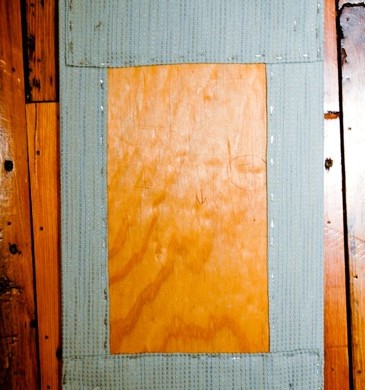
We cut out plywood to fit where the stereo speaker covers used to be (goodbye pumpkin color) and covered them with some very cool vintage blue fabric. We also installed a clasp to connect this plywood piece into the main body of the stereo cabinet.


Here’s the receiver for the piece of plywood that is now covered in blue fabric. This allows you to remove the blue panels and have access to the sides of the stereo cabinet.


I found these legs at Lowe’s for $3 a piece and stained them to match the cabinet. I added a little sticky felt to the bottom so they wouldn’t scratch my sweet floors.


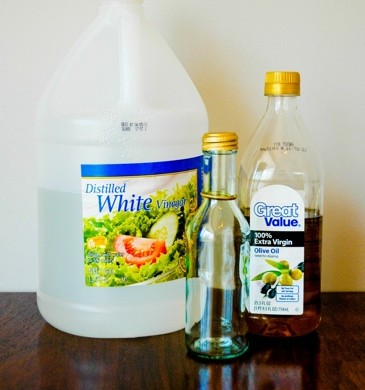
Lastly, I cleaned the entire thing using my special cleaning/furniture polish (3C olive oil to 1C white vinegar-mix in jar, use soft cloth to apply to furniture). It has brought life to the dullest piece of wood, is super cheap and ‘green’.


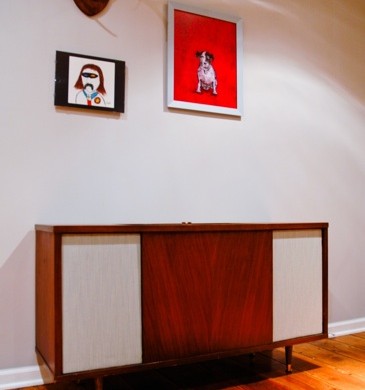
And now, all of this….


Fits secretly in here. My solution cost me a total of $22. I think that’s pretty freakin’ cool, don’t you?

Read more

Stingy ‘Green Cleanin’

When ‘being green’ was still attributed to Kermit the Frog, out of necessity, I came upon these homemade cleansers that cost pennies on the dollar.
And I have a theory, if I can eat it, then I can clean with it. This theory doesn’t work all that well when I come to vacuums…

“Ocean breeze will make you clean.” Name that Kermit movie and you’ll get a star.


If you have hair on your head like I have hair on my head, you need this recipe.

Green Drain Cleaner:
1/2 Cup Baking Soda
1/2 Cup White Vinegar
Boiling Water
Pour Baking Soda down the drain. Add white vinegar and cover the drain, if possible. Let set for 5 minutes. Pour the boiling water down the drain.


We are dusty people. We like to leave the doors open for fresh air, but then regret it when we wipe our fingers along the coffee table, leaving a stripe behind. You win some, you loose some.
This recipe has restored life to most of our vintage finds, too!

Green Furniture Polish and Cleaner:
3 Cups Olive Oil
1 Cup White Vinegar
Mix together in a jar and pour onto a soft cloth. Remix every so often by shaking the jar again.


If you restore old homes, or parts of old homes, this recipe is a must. I have removed years of gross crap off of fixtures, fireplaces and doorknobs.

Green Brass Cleaner:
Lemon Juice
Baking Soda
Make a paste the consistency of toothpaste. Rub onto brass with a soft cloth. Rinse with water and dry.


Lime and gunk will magically disappear. I use this on all of my faucets and chrome baking tins.

Green Chrome and Stainless Steel Cleanser:
1 Cup Vinegar
1/2 Cup Water
Mix in a recycled spray bottle. Spray solution on the chrome/stainless steel and let sit for a minute. Wipe off with damp sponge and dry with a soft cloth.


I know we don’t like to talk about toilets. Or their bowls. Or the funk that grows inside. But, you gotta clean it. Why not do it green style?

Green Toilet Bowl Cleaner:
Baking Soda
Vinegar
Sprinkle baking soda into toilet bowl. Add vinegar. Scrub ‘er down with a toilet brush.

Read more