Archive for category: Sewing

“Crafting with Cat Hair”-Weirdest Present Ever

You all know that I’m weird. That’s no surprise. But, did you know that my weirdness attracts more weirdness?


I have this lovely friend Jennifer–pictured here on the left (which you can read all about her in my article: Together in Tulsa in This Land Press) that gave me the weirdest present ever. And for an unseen bonus-it was wrapped in Christmas paper, but yet given to me in April.


Now, you may say, “Weirdest present ever? Come on, Rebekah. Surely being a part of your family, you’ve received weirder.”

You have a good point. And it’s obvious you don’t believe me. Let me prove it.


Weirdest Present Ever

Yep, a book called “Crafting with Cat Hair”.


Jennifer claimed that she “saw the book and thought of me”.

Funny, Jennifer-real funny.

Now, I may be fully into my cats, but am I a crazy cat lady? I think that I have proven that I am not.


The concept behind the book is recycling your pet’s hair and turning it into crafty “everyday” items. Like picture framed images made from cat hair of your cat.

That’s pretty “everyday”, don’t you think?


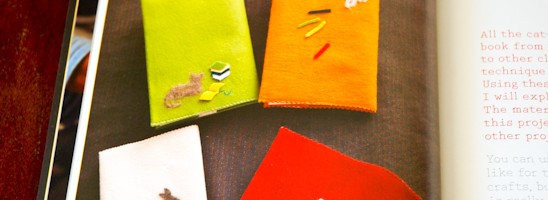
Maybe something a little more “everyday” are felt book covers, embellished with cat images made from you cat’s hair. I wouldn’t give it a second thought to pull this out at my local coffee shop.


The book also teaches you how to make fun toys for your cat from their own hair. Hm…

Not weird at all.


It offers patterns, step-by-step guides and instructions, as well as…


…how to harvest your cat’s hair and store it properly until you are ready to craft with it.


I suppose if the kittens in your house are just going to upchuck it anyways, you might as well get green and recycle that cat hair. I mean, what could be wrong about that?

Absolutely nothing.

By the way, Jennifer-you are in big trouble. And paybacks are…well, you know what they are….
Read more

A few of My Favorite Things

If you are a new reader here, it might be a lot for you to comb through all of my back posts looking for juicy tidbits to make your day. I thought I’d make that easy for you and show you a few fun things I’ve done over the past year or so. One of these projects might just become your favorite, too. A girl can dream, right?


Broken Mirror Art from recycled mirror bits and pieces. When the light hits it, the whole room shimmers!


A Springy, Silk Scarf Shirt is the perfect answer for a wintery wardrobe. And, it’s so easy & cheap to make yourself!


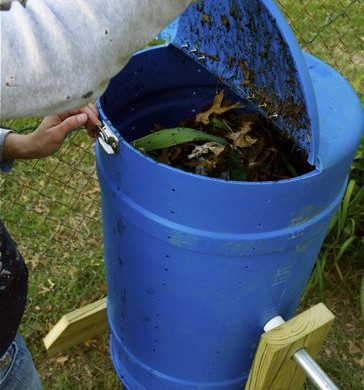
If you haven’t seen my DIY Spinning Composter already, here she is. (And here’s the video of it in action.) This composter design speeds up the composting process from months to weeks. And made from recycled/salvaged materials makes it easy on the pocketbook, too.


Make your own Simple, Organic balm quickly, easily and cheaply. I love it better than my Burt’s Bees. I ain’t goin’ back, baby!


In an effort to rid my house of nasty chemicals, I made my own Cheap, Organic Face Wash-made from ground oatmeal. So easy. So lovely. So breakfasty.


Use an old tablecloth or curtain to make this Lace Cape Shirt. Simple, practical and it looks great with a little tank top underneath.


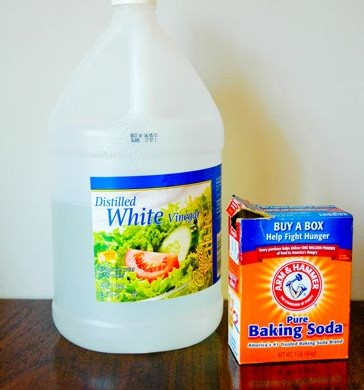
I wanted to replace the cleansers in my house with something more organic and cheap. My Homemade Household Green Cleansers list several recipes to get you ready to boot out nasty chemicals from your house, too!

Hope you’ve found a little something that suits your fancy. If not, I’ll keep trying to get you hooked. Maybe not today, maybe not tomorrow, but soon and for the rest of your life.

Read more

Easy Lace Cape-Shirt

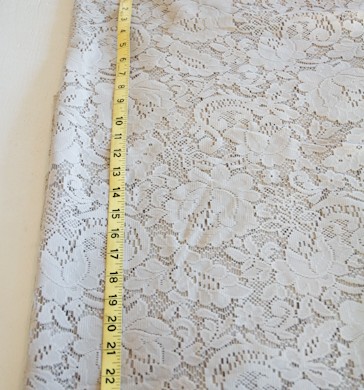
My lovely sis-in-law gave to me a set of lace curtains that she could no longer use. What’s a girl to do but make a shirt from them? (This idea works fine with a lace tablecloth, too.)


Within an hour or so, I had a sweet new shirt that goes with just about anything. This may seem like a lot of steps, but it’s just that I’m a little overboard on details, sometimes.


Here’s what you’ll need to make your very own Lace Cape-Shirt:

Fabric Lace-at least 40″ in width, 25″ in length
Thread to match
Scissors
Tape Measure
Straight Pins
Sewing Machine
Heat ‘n Bond Tape
Iron
Lace Edging


First, fold the material in half from top to bottom.
Then fold the material in half from the left side to the right side.
To make the circle that will be your cape, begin by measuring 20″ from the corner fold across the top fold. Place a straight pin at the 20″ mark.


Measure 24 1/2″ from the corner fold down the side fold. Place a straight pin at the 24 1/2″ mark.


At a 45 degree angle from the corner fold, measure out 23″. Place a straight pin at the 23″ mark.
Alternately on either side of the 45 degree angle, measure 20 1/2″ at a 22 1/2 degree angle, and 24″ at a 67 1/2 degree angle.


Following your pin marks, cut out the quarter circle shape.


At the corner fold, measure down 2″ and across 2″. Cut out the tiny quarter circle shape. This will be the start of the neck hole.


Unfold the quarter circle to the left, leaving the top folded. This should now be the bottom half of a circle.
Measure and pin 6 1/2″ across the top fold of the lace, centered over the 2″ mark already cut for the neck hole. Increase the neck hole by cutting along these guides making the hole now 6 1/2″ wide.


Measure 2″ down from the already snipped portion of the fabric on only ONE side of the shirt. To increase the neck hole on only the FRONT side of the shirt, deepen the plunge the additional 2″.
Leave the back side of the shirt as is.


With the front of the shirt folded to once again create the quarter circle, measure down from center 4″.


Cut the 4″ slit on ONLY the front side of the shirt.


I used a hem stitch to finish off all of the edges of my lace. You can do whatever you want, but this seemed to work the best for me. So there.


Sew all of the edges on the shirt, including the neck hole.


Once all of your edges are sewn, fold the shirt once more with the neck hole in the front, a fold across the top, creating the bottom of a circle.
On each side, measure 10″ in across the top fold and pin (yellow pin in picture). Then measure from that pin 13″ down and pin (white pin). From that pin, measure back towards the edge 7 1/2″ (pink pin).
(This shouldn’t change the location of the 13″ pin, it’s just a double check that you measured correctly).
Sew two 1/4″ “stays” at the 13″ mark with a quick zig-zag stitch through both pieces of material. This will keep the cape in the right place on the body.


I decided to trim out the neck hole with lace edging. I followed the package directions on the Heat ‘n Bond to apply the edging to the shirt.


I liked using a darker color to offset the gray lace. But, the same color of lace would be just as pretty to make a plainer shirt.


Tah-dah! That’s all there is to it. Slip the Lace Cape-Shirt on over a bold colored cami and call it a day. Below is the back of the shirt.


Simple. Cute. Cheap. Fun.
That’s the way I like my crafts (or crap, whatever…).

Read more

Sassy Military Up-Cycle Shirt

A few too many plain t-shirts are junking up my closet. When wearing a plain tee-I feel as if I am blending into the crowd. Today was the day to ‘Sassify’ one of my old boring t-shirts. I spent less than an hour of my day and used scraps of materials, turning this ‘yawner’ into a ‘take notice’.

This t-shirt is a nod to my Dad and the military blood that is running through my veins.
Having a father that is a Retired Lieutenant Colonel and a West Point Graduate influences much of my daily life-and now my clothing apparently…
I added little button details on the front and the back, just for a little more sass.


Here’s what you’ll need to ‘Sassify’ your own plain t-shirt:
Scraps of material (I would recommend using felt in a bold color)
Heat n Bond
Scissors
Tape measure
Seam Ripper
Iron & Ironing board


Using your scraps of material, pick out your style for your new shirt.
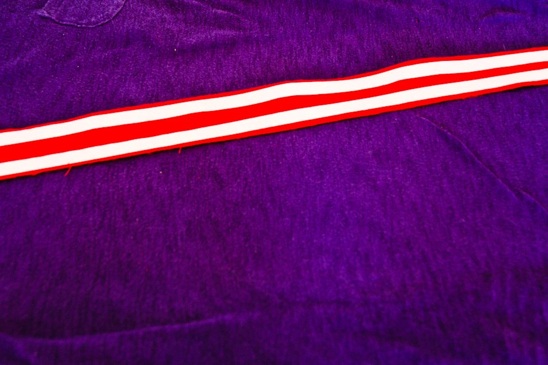
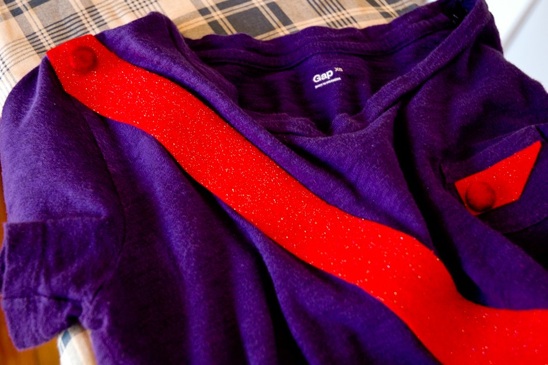
I decided on a simple stripe and used sparkly red felt (so that I wouldn’t have to seam the ends) on a deep purple shirt. But I say, ‘Get crazy!’ Make different colors of flowers, a bird, a cactus…whatever the heck comes to mind.


Apply your Heat n Bond according to the package directions. Iron that sucker in place and let cool.


After adding my stripe to the front of the shirt, I decided the tiny pocket needed a little something too. I added this geometric shape using the same Heat n Bond technique.


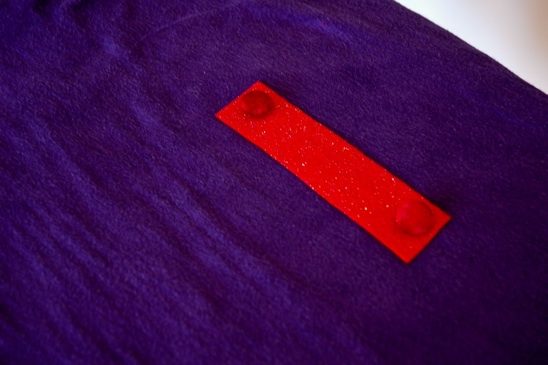
Lastly, I added a swatch that rests on the small of my back. I used Heat n Bond once again to attach it to the shirt. Next, I added buttons to give it that ‘military look’.


Here is a close up on the buttons that I added to the front of the shirt.
Snazzy and so easy.


Once more, here is the final product that set me back less than $1. And below is the back of the shirt.


I am so happy that this little ditty has a new life. It was headed for the garage sale pile, and now it’s my sassy go-to shirt when needed.
My Dad would be so proud.

Read more