Tag Archive for: scarf

What do you Fall for?

Good morning! First things first, I must talk about the pink elephant in the white room. I have not been posting as frequently-as I’m sure you’ve noticed. Without going into too much detail, I’ve needed a little reprieve.
But, that reprieve has been had and now it’s time to get back to business. The crisp fall air is upon us and I feel invigorated to sew, cook, create, build and ramble on about the things of God that I’m learning.

Can you handle all the weirdness that is Rebekah? Please scroll down before you answer that.
Green Beans-Kayle & Rebekah
Probably not. But that’s why we have the buffer of the internet between my weirdness and your purity, dear reader.

Anywho, it’s fall time. A time of harvest, hot coffee and fun wintery-type projects. What are your favorite fall things to do?


Fall Lane
At the top of my fall list is leaf watching. I could stare at, walk through, collect and photograph the changing leaves from now until eternity. And since I’ve already cleared it with God that there will be seasons in heaven, this love affair will not end.
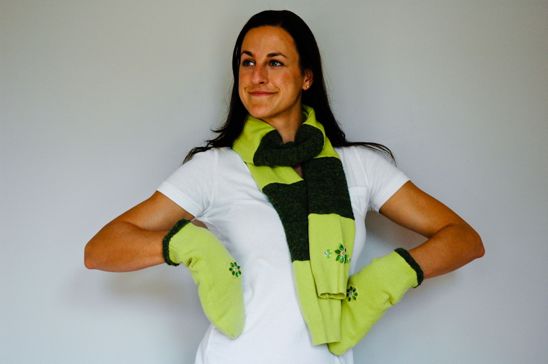
 

Scarf & mittens
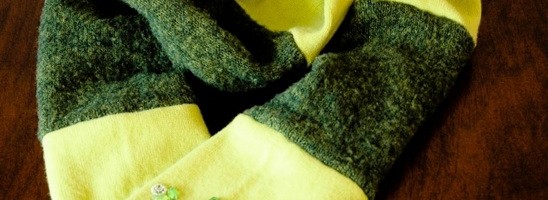
Another one of my favorite things to prepare for the cold, fall weather is to make mittens out of old sweaters. I can never seem to find the cuteness factor when shopping for store-made mittens. Plus, store-bought are either too small, too scratchy or don’t match my winter coat. I came up with my own solution and made a pair of mittens and a matching scarf from two old sweaters.

Problem solved, mate.

 

Corn Maize
Like a child, I cannot get enough of a good Maize Maze. The swishing stalks against a pale blue sky takes me back home to Kansas, to wheat fields, to harvest festivals. Plus, a good Maize Maze is always accompanied by horsey rides, apple cider and other fall accoutrements.

What more could you ask for?

 

Pumpkin Patch
Maybe a pumpkin patch? Yes, please. Pumpkin patches are to fall as snow is to Christmas. The grocery store cardboard bins full of pumpkins should be shunned other than for last minute pumpkiny needs, such as decorating your porch when unannounced guests come to visit.

Otherwise, I implore you to drive at least 45 minutes to a pumpkin patch, labor over which has the perfect stem-to-body ratio and finally choose your pumpkin-already knowing which side you will be carving a face into.

Please, for all pumpkins everywhere, do the right thing.


Ginger Puff Cookies

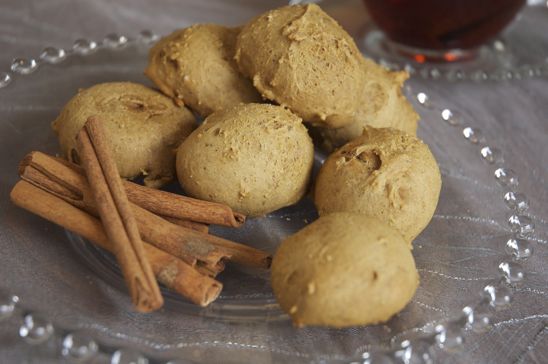
Finally, nothing says fall like all things cinnamony, nutgmegy and spicey. I love to kick off fall by cooking a huge batch of Ginger Snap Cookies, sharing it with the neighbors and nibbling on a few of my own. This pictured version above is a skinny version I created, called “Ginger Puff Cookies“, for those of you watching the waistline.

I also think fall should be accompanied by homemade No Fuss, No Sugar Applesauce, Beautiful Banana Bread andEasy Chili.

What are your favorite fall things to create, bake, sew or enjoy? I’d love to know, dear readers-for you are my inspiration to keep writing and creating things!

 

Read more

Springy, Silk Scarf Shirt-Live on GDGC

This morning, I will again be LIVE on Fox23’s “Great Day, Green Country” showing how to make this Springy, Silk Scarf Shirt. I like to create many of the items I wear-this not only helps pinch pennies but prevents the awkward ‘you’re wearing the same thing I’m wearing’ at a party. This scarf shirt is inexpensive and very simple to make.
Not only will it flatter any body type as it tapers in at the smallest point of the waist, but it will also keep you cool throughout a hot summer.
Skill Level: If I can do it, you can do it. (A.K.A. Easy.)


The robots have determined my live video can be viewed now. Enjoy. Nanu-nanu.


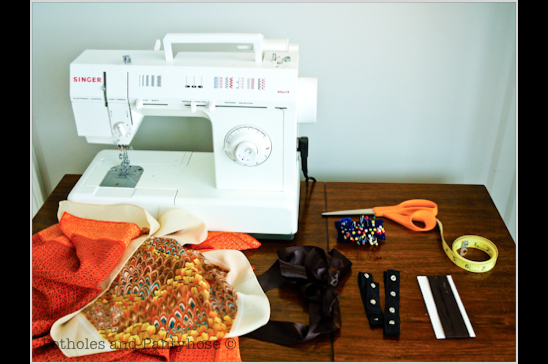
What you’ll need:
2 Scarves (approx. 2’ x 2’)
Sewing Machine
Thread and Bobbin to Match
Straight Pins
Lighter
Scissors
(2) 3″ squares and (4) 2″ squares Hem or Bias Tape, fold cut sides and iron flat
(2) 12″ sections of Craft Ribbon or Section of Snaps (like on a onesy)
(3) 2″ sections of velcro if not using snaps
(2) 18″ Sections of Craft Ribbon


Determine which scarf will be your ‘front’ and which will be the ‘back’ of your shirt.
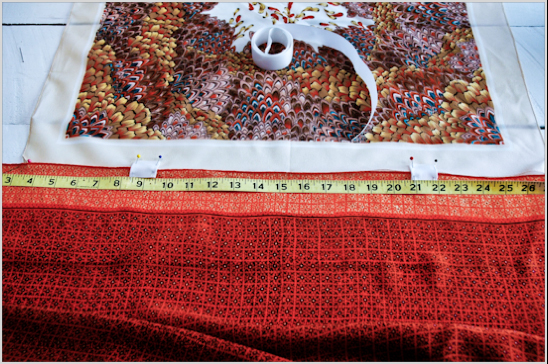
Lay your scarves end to end and measure the center. Pin the two pieces of 3” hem tape, 6 inches on either side of center. The area in the middle will be your neck opening.
And if you have a really big head or constantly sport a big hairdo, then widen the opening for heaven’s sake.


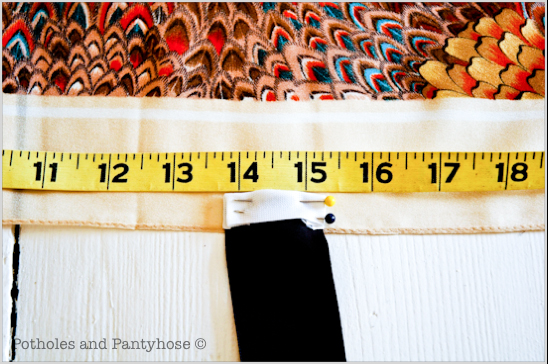
On what will be the sides of your scarf, measure 14 1/2” down. This measurement should be just above your belly button.
This will enhance the tiny part of your waist and make you look va-va-voom.
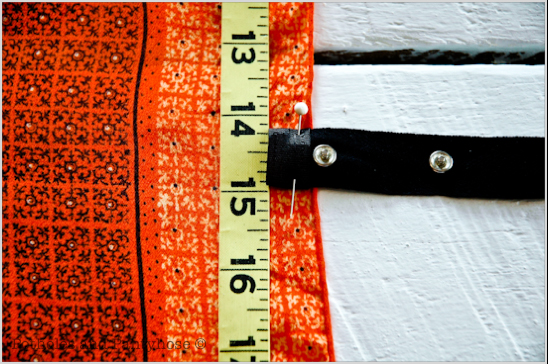
Using the 2” hem tape, pin both sections of the 18″ ribbon on the side of your ‘front scarf’ at the 14 1/2” mark.


Follow the same instructions if you are using snaps, pinning them onto the ‘back scarf.’ If using the 12″ ribbon and velcro, sew the (3) 2″ sections of velcro along the ribbon. Use the 2″ bias tape to secure the ribbon to the back scarf.


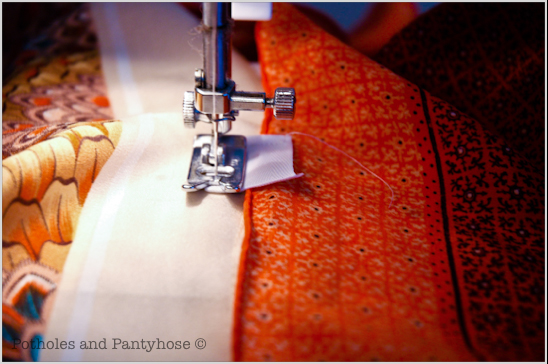
Sew everything you have pinned on with a straight stitch, making a box with the thread around the hem tape.
This ‘box’ protects the delicate nature of silk from tearing. And when you’ve eaten too much, you’ll be thankful for it.


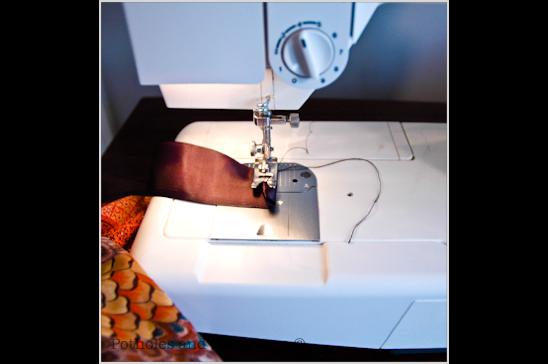
Sew the ends of the ribbon to prevent them from fraying–unless you like that worn look. Or, you can use a lighter to burn the ends which will also prevent fraying.


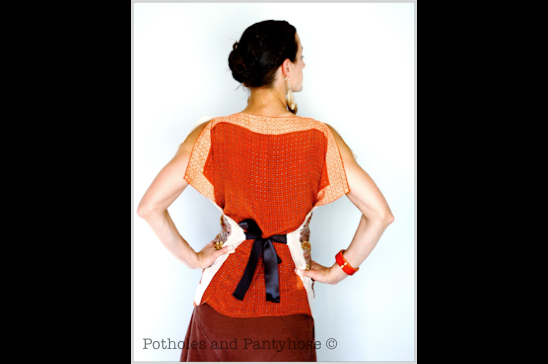
After slipping your shirt over your head, fasten the snaps or the velcro in the front around your stomach area, and tie it closed with the ribbon in the back.

It looks great paired with skinny jeans, a flowy skirt or shorts. I tend to wear bold, chunky jewelry with my scarf shirt, but I give you permission to accessorize at will.

Happy Sewing!

♥ ♥ ♥

Here are the links to my other LIVE TV appearances on Fox23’s Great Day Green Country:

Here are links to my Homemade Household Cleansers and Beauty Products:

And here are a few Homemade Food Items to easily replace store-bought items:

Thanks so much for stopping by and spending time with such a weirdo. Make sure you become a Facebook Fan or a Linky Follower to keep up to date with what this weirdo comes up with next. Have a great day!

Read more

Recycled Sweater Scarf

I own several cute sweaters that have have seen better days.
Pilly, accidentally shrunken and worn out in places, these sweaters were on the verge of being tossed out.
But the fabrics were soft and cozy and they asked me for a second chance.

Armed with my old, pilly sweaters and with the need for wintery accoutrements; I forged into the unknown world of scarves and mittens…with a seam ripper at my side.
(So, as not to overwhelm, this tutorial will focus on the scarf. I’ll add the tutorial for the mittens later.)


Here’s what you’ll need to make your own sweater scarf:
Two old sweaters
Scissors
Seam Ripper (if you sew like me)
Straight pins
Tape measure
Thread and Bobbin to match
Sewing Machine


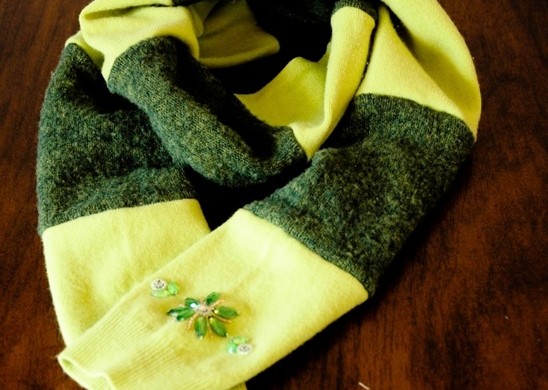
Cut the sleeves from the body of both of the sweaters. One of my sleeves had pretties on it, which I placed strategically at the end of the scarf.


Measure the overall length of your sleeves and divide by three, cutting the sleeve in thirds. Each of my three pieces measured to be 6 1/2” long. A typical scarf if about 50-55” in length. Mine ended up being about 58”.


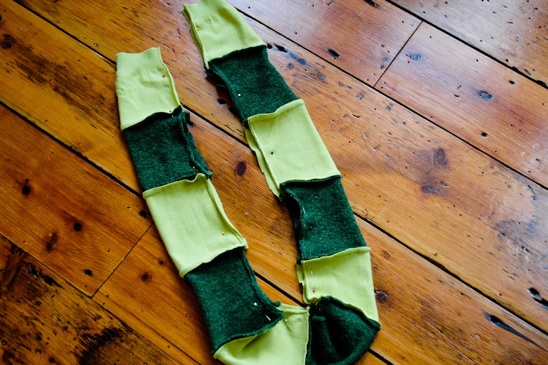
Lay the cut pieces out in an alternating pattern. I used the sleeves of my lime green sweater to be the end pieces of the scarf.


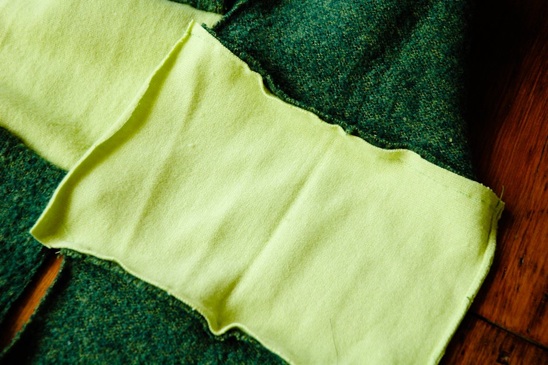
Cut along the old seam of each of your pieces, laying them open flat.


Pin each flat piece to the next, right sides together, with a 1/4” seam allowance.


Double check that the right sides are all on one side of the scarf by laying it out flat.
My scarf started resembling a caterpillar at this point.


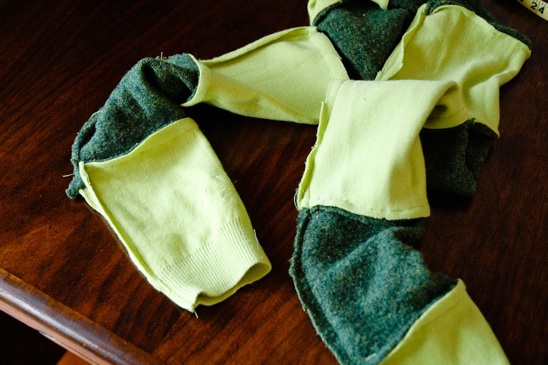
Sew together each of the pinned pieces on the wrong side of the material.


The seams should all be on the wrong side of the material. If not, pull out your handy dandy seam ripper out and get to work…


Fold the scarf in half, lengthwise. Pin together, leaving a 1/4” seam allowance.


Once the length of the scarf has been sewn a fresh new seam, turn it inside out.


I left the ends of the scarf open, but you can sure as heck sew yours closed. I wanted the option of smuggling candy inside of them if need be.


Try the cuteness factor of your scarf out by wearing it around the house. Add sassy stances and flip the end of the scarf around your neck until your husband notices.
When he asks you why you are wearing a scarf when it is still 94 degrees outside, tell him that you saved him $35 by making your own scarf from old sweaters.
I guarantee you that he will love your new scarf.
(Make sure you stop back by soon. I’ll be putting up the tutorial for the matching mittens for your sewing pleasure!)

Read more

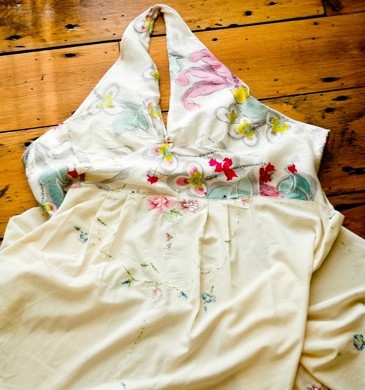
Va-Va-Voom Vintage Tablecloth Dress

Grandma Greiman sent me away from her farm with a trailer full of treasures.
This old tablecloth was barely holding on to its original embroidered flowers and I couldn’t bear to throw it out or tear it up into scraps.
So, why not throw in a scarf for good measure and make a dress?

Scarves have become one of my favorite fabric pieces to re-invent.
They are the perfect material for molding into free-flowing sassy pieces. And boy am I into the sass. You have no idea.


I created my own pattern for this dress by trial and error. (My pattern was made for me, and I am a size two. If you would like to increase the size, a general rule is to add 1/4” all the way around per size increase.)

To Make this Dress, you’ll need:
Four Pattern Pieces (Front Piece #1, Front Piece #2, Back Piece, Middle Piece)
One Large Silk Scarf
Cotton backing fabric the same size as the scarf
Round Tablecloth (mine was 66” in diameter)
20” Zipper
Straight Pins
Scissors
Seam Ripper (If your expertise is anything like mine)
Thread to Match
Sewing Machine

Fold your scarf in half and lay your pattern on top of it. Cut out two ‘back pieces’, two ‘front pieces’ and one middle piece.

Repeat this procedure with the cotton backing fabric.


With the right side of your fabric down, pin the pleats in your two front pieces and iron them flat.
Then pin the two front pieces to your middle piece and sew.
Make sure you sew the neck pieces together as well.


Pin & sew your two ‘back’ pieces to what you had just sewn together.


We are going to repeat this process with your scarf. But since I am a visual learner, I will go ahead and do it all over again for you. With the right side of your scarf fabric down, pin your pleats in the ‘front’ pieces first and iron them flat.
Now, pin your two ‘front’ pieces to your ‘middle’ piece and sew.
Make sure you sew the neck pieces together as well.


Pin & sew your two ‘back’ pieces to what you had just sewn together.
This seems all too familiar….


With right sides of your material together, pin your scarf to your cotton backing material. Sew all of your outside seams together, leaving the bottom open. We will now call this the ‘Top Piece’.


Fold your round tablecloth in half and place it on top of the right side of the material to your Top Piece.
Find the center of your folded tablecloth and pin it to the center of the bottom of your ‘Top Piece’.
Working from the center out, pin the folded tablecloth around the entirety of your top piece. Sew the Top and Bottom pieces together.
I added pleats to my tablecloth ‘Bottom Piece’, just in case I partake of a single scoop of peppermint ice cream in a waffle cone…but you do what you want.


Next comes the zipper. My favorite part. Notice my text is oozing with sarcasm.
I have never liked putting in zippers. I don’t know why…I just don’t.
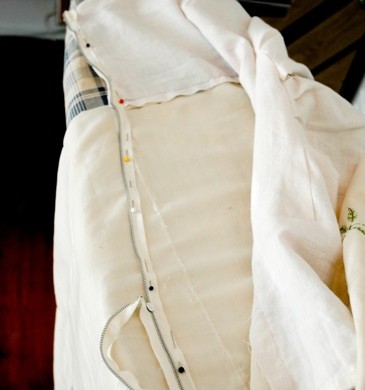
Anywho…fold the right side of your fabric over a quarter of an inch on your Top Piece and pin your zipper on the inside of the material.
Do NOT fold over your material on your Bottom Piece. Pin the zipper directly to the material, leaving the excess to do as it pleases.
Give your Booty some room to breath by fanning the zipper away from the waist until you reach the end of the zipper on the Bottom Piece. (Mine needed an extra 2” from waist to end of zipper.)
Sew your zipper into place on both sides.


Here is the finished VA-VA-VOOM Vintage Tablecloth Dress.
Mine and the dress’ backside is below.


I can’t wait to wear this little piece out on the town! Now, to convince Biceps we need a night out on the town…..

Read more