Tag Archive for: recycled

Sassy Military Up-Cycle Shirt

A few too many plain t-shirts are junking up my closet. When wearing a plain tee-I feel as if I am blending into the crowd. Today was the day to ‘Sassify’ one of my old boring t-shirts. I spent less than an hour of my day and used scraps of materials, turning this ‘yawner’ into a ‘take notice’.

This t-shirt is a nod to my Dad and the military blood that is running through my veins.
Having a father that is a Retired Lieutenant Colonel and a West Point Graduate influences much of my daily life-and now my clothing apparently…
I added little button details on the front and the back, just for a little more sass.


Here’s what you’ll need to ‘Sassify’ your own plain t-shirt:
Scraps of material (I would recommend using felt in a bold color)
Heat n Bond
Scissors
Tape measure
Seam Ripper
Iron & Ironing board


Using your scraps of material, pick out your style for your new shirt.
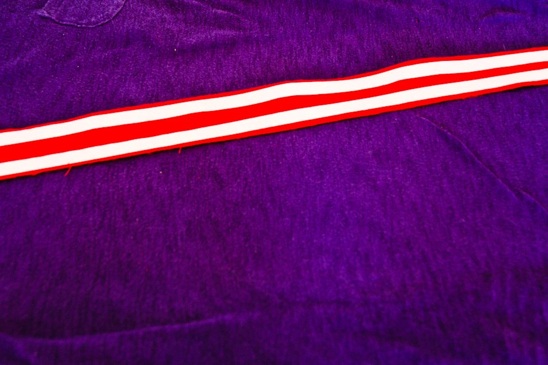
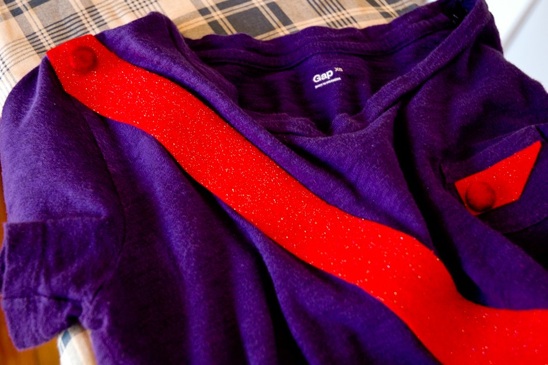
I decided on a simple stripe and used sparkly red felt (so that I wouldn’t have to seam the ends) on a deep purple shirt. But I say, ‘Get crazy!’ Make different colors of flowers, a bird, a cactus…whatever the heck comes to mind.


Apply your Heat n Bond according to the package directions. Iron that sucker in place and let cool.


After adding my stripe to the front of the shirt, I decided the tiny pocket needed a little something too. I added this geometric shape using the same Heat n Bond technique.


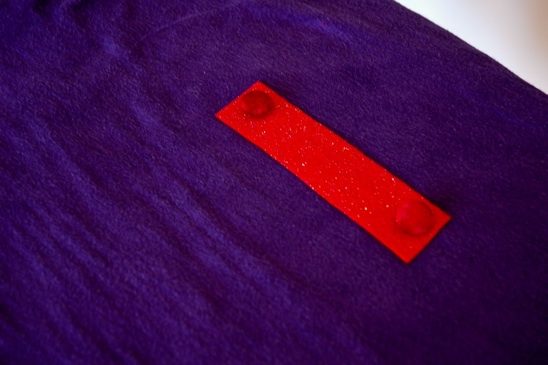
Lastly, I added a swatch that rests on the small of my back. I used Heat n Bond once again to attach it to the shirt. Next, I added buttons to give it that ‘military look’.


Here is a close up on the buttons that I added to the front of the shirt.
Snazzy and so easy.


Once more, here is the final product that set me back less than $1. And below is the back of the shirt.


I am so happy that this little ditty has a new life. It was headed for the garage sale pile, and now it’s my sassy go-to shirt when needed.
My Dad would be so proud.

Read more

Recycled Sweater Mittens

I love wintery mittens and needed a pair to accompany the Sweater Scarf I had recently created.
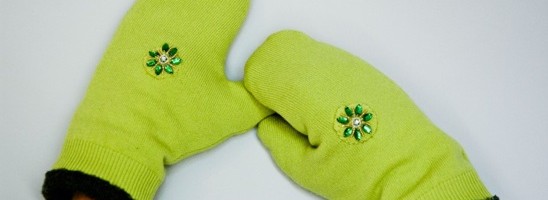
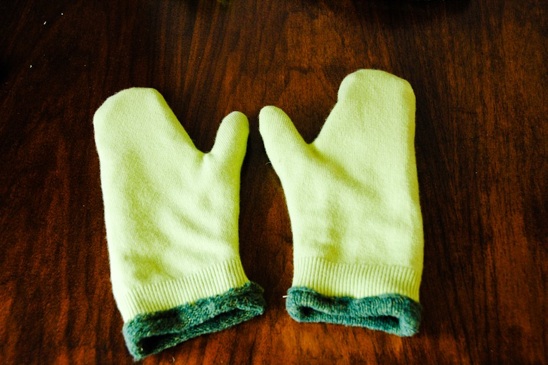
Using the sweater scraps leftover from the scarf, I was able to make two adorable, matching mittens.

I lined my mittens with a darker sweater material, leaving the vibrant lime green material on the outside for prime cuteness.


Here’s the two pieces together in action. I can’t wait for the weather to turn colder so that I may sport these around town.


This is what you’ll need for you very own pair o’ mittens:
Two old sweaters
Scissors
Seam Ripper (for mistakes…which I typically make)
Straight pins
Tape measure
Thread and Bobbin to match
Sewing Machine


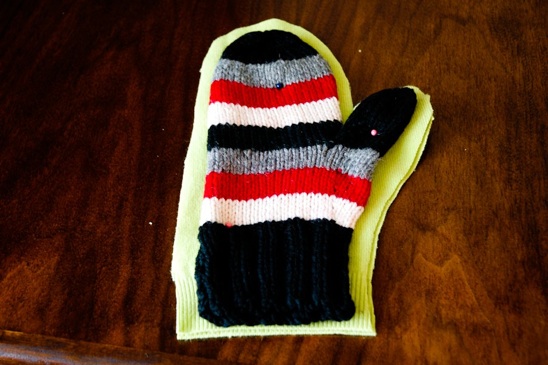
I am sure there is a more technical way to create mittens, but I had a pair of stripy mittens that fit my hands well.
Using the stripy mitten as a template, I lined it up on the body of the sweater. I wanted the ribbing of the bottom of the sweater to be the opening of my mitten (where it would hit my wrists).
With the fabric doubled and with right sides out, I pinned the stripy mitten to the sweater fabric.


I cut around the stripy mitten, leaving a 1/4” seam allowance, creating two pieces of material with the fabric right side out.


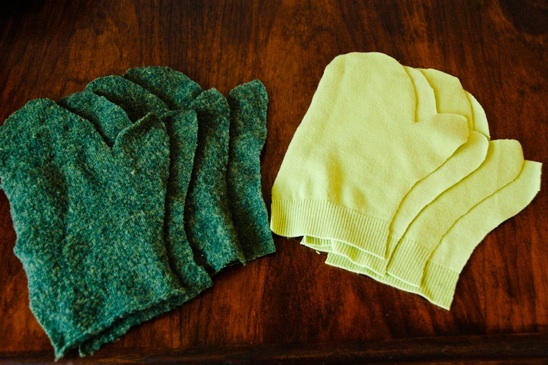
Using the recently cut out pieces from the lime green sweater, I pinned one to the wrong side of the lime green sweater, with the fabric doubled.
I cut out two more lime green pieces, creating four pieces altogether.
I then cut out two darker green sweater pieces, with right sides out, but allowing for a 1/4” seam allowance around the entirety of the mitten.
I turned the darker green sweater inside out and cut out two more mittens.


I now had eight total pieces; four darker green and four lime green.
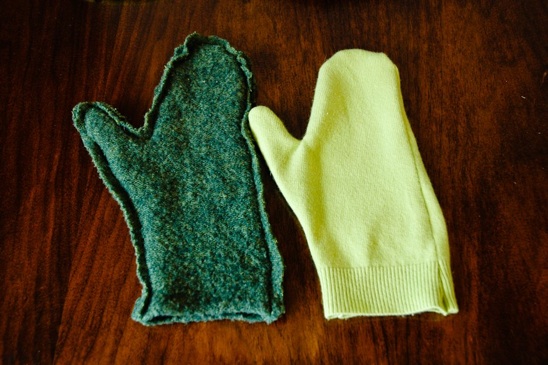
When viewing the pieces going in the same direction, you should now have two of each color with right sides out and two with wrong sides out.


Sew together two matching pieces with the thumbs facing the same direction and with the material wrong side out. You should end up with four total mittens.
Turn the set right side out that will be the outside of your mittens.


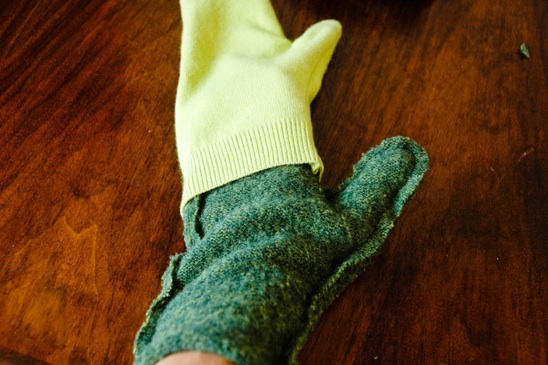
Insert the inside of your mitten into the outside of your mitten.


Fold over and sew the extra 1/4” of the inside of your mitten onto the bottom of the outside of your mitten.


I harvested embellishments from the original sweater and hand sewed them to the front of my cutesy little gloves. Which then reminded me of a whale…which then made me take this photograph…which you are now forced to endure.


Here’s a look at the entire ensemble which has made me happier than a hot pig in a cold mud bath.
Weird analogy, I know. But that’s just me-weird.

Read more

My Lamp, My Lamp, My Lovely Leftovers Lamp

Check it out!
While Biceps and I were on a romantic date at Habitat for Humanity, I scored a swag light down rod and a trash can cover for $1. He always takes me to the coolest places. I knew I could make something from them, and he couldn’t argue with the price.
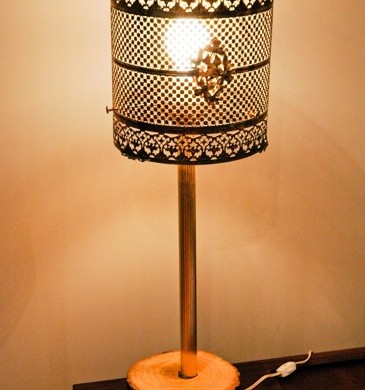
You may already know that I have an affinity for log-inspired pieces around my home. (Check out my Mod Log Table). While passing by one of my rent houses, I saw a felled tree and grabbed a chunk of it from an old pal’s front yard. With my two Habitat pieces in hand and now my chunk o’ log, history was about to be made.
Or at least a ‘Lovely Leftovers Lamp’.


Here’s what you’ll need to make your own ‘Lovely Leftover Lamp’.
A drill with a paddle bit (I used a 1”)
Router or a Skill Saw
Belt or Palm Sander with 40 & 80 grit paper
Polyurethane and Foamy Brush
Tape Measure
Chunk o’ Log with the cross-cuts parallel to each other (mine is 3 1/2” tall and 7” in diameter)


You’ll also need:
Trash Can Cover (mine was 8 1/2” in diameter-you could use fancy tin cans, or learn how to make your own Cutey Cans)
Swag Down Rod
Additional Wiring, wire nuts & Switch (if the old wiring is sketchy looking)
Spray Paint that matches your trash can cover
3” Threaded Rods
3/16” Threaded Aluminum Posts


I sprayed my 3” Threaded Rods and 3/16” Threaded Aluminum Posts GOLD to match the rest of my lamp.
These little buggers will attach the trash can cover to the down rod.


I sanded my log to be baby smooth, starting with a 40 grit and then moving up to an 80 grit.


After your log is smooth on both sides, measure the diameter of your log and mark the center.
Easy enough.


I used a 1” paddle bit to drill through the center of my log which accommodated the 1” diamater of my down rod. Adjust the size of your bit to the size of your down rod.
If your down rod is bigger than 1”, you may need to use a hole saw (which also attaches to your drill).

Drill all the way through, allowing your drill to rest periodically when the bit gets too hot. A hot drill bit and a lot of sawdust tends to have a weird reaction that I like to call ‘Fire’.
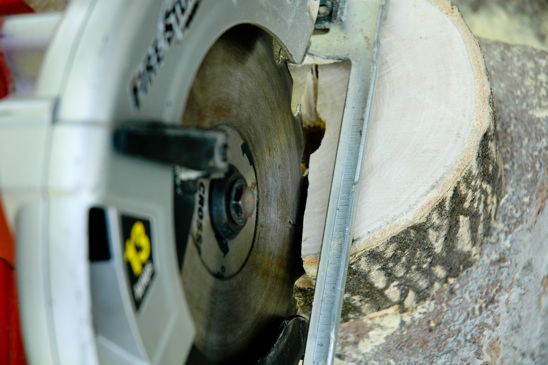

Next, we’ll make a channel on the bottom of our log for the wiring to come through.
It would be best to use a router, but since I didn’t have one, I went with a skill saw that I depth set to 1”. You aren’t cutting through the whole log, just making a channel for your wiring.


I know this channel for my wiring isn’t that pretty, but since it’s the undercarriage of my log (weird) and I will be covering it with some sort of soft feltiness in the long run, I was alright with it. Now that all of the sanding and cutting is done, wipe off your log thoroughly with a microfiber cloth.
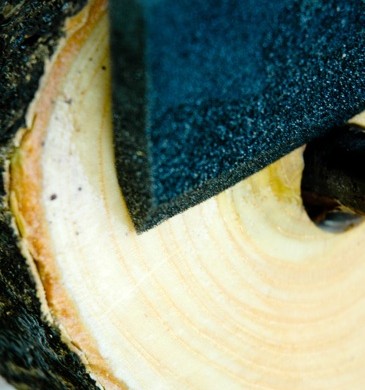

Break out the poly and your foamy brush. Apply a thin layer of poly to your log. Let dry according to your manufacturer’s directions. Once the log is dry, use a steel wool to lightly sand the top and bottom, removing any air bubbles.

Re-apply a second coat if you desire. I usually desire.


I needed a longer run of wire, and decided to tie in some white wire that I had leftover from another project, using two wire nuts that didn’t match and one of which was covered in a sticky substance.
Don’t judge. I’m going for cheap here.


Line up the tips of your exposed copper wire which should be about a 1/4” long, and place the wire nut on top of the two wires (Connect the ribbed wire-it will feel like it has ribs on it, to the other ribbed wire. Connect your smooth wire to your smooth wire).

Screw down the wire nut as far as possible and pull the wires away from the wire nut, making sure they are firmly attached. I used electrical tape around the nuts and wires, just as an added precaution.


Place your down rod through the hole you drilled in your log, feeding the wire through the channel on the bottom of your log. You can cover the bottom of your log with felt or fabric using a hot glue gun.
I know you guys like your glue guns. Get crazy.


I wanted a switch on my lamp, and since they are super easy and cheap, I went for it. I like cheap and easy.
Follow the instructions on the package. It took me less than a minute to do this.


Flip your log over. Attach your trash can cover to your down rod by using your spray painted threaded posts and rods. Feed the 3” threaded rods from the outside in, threading it into the top of the down rod where a globe is usually attached. Use your threaded posts to cap the end of the threaded rods on the outside of your trash can cover. If you have a solid cover, you may need to drill out tiny holes for your threaded rods to go through.

Let’s plug it in!
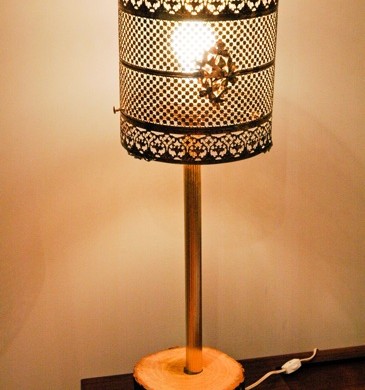

Isn’t it just so purty? I love my new ‘Lovely Leftovers Lamp’!

Read more

My Home Tour

I love being on the road with Biceps.
But the smelly bars, graffitied bathrooms and late nights
can take a toll on a woman.
I love my safe oasis, my clean house.
I need my nest. Tweet, tweet.

And as they say in Oklahoma:
“Ya’ll Come On In and Throw Your Feet Up!”


Our kitchen is the hub of any and all activity. I spend 99.99% of my
time here. Maybe a little more. Either I am cooking, cleaning up my mess from cooking , or I am merely entertaining guests that drop by. The countertops are trowel finished concrete and the floors are the recycled haymow flooring from Bicep’s family’s century barn.
The cabinets? Well…Ikea, of course.


This is a little sitting room off of our kitchen. I picture our children (not that we have any) playing intelligently with blocks and reasoning out conflicts amongst themselves while listening to Mozart.
But for now, this is our workout area every morning. We just scoot everything out of the way and get crazy.


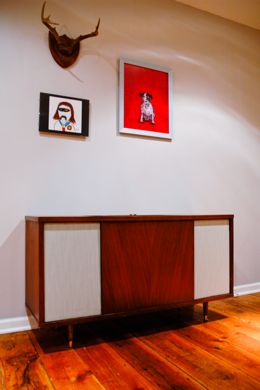
In the same room sits this little disguised piece of furniture. I gutted this stereo cabinet to house all of our workout equipment and our weights.
Aren’t I a sneaky little devil?


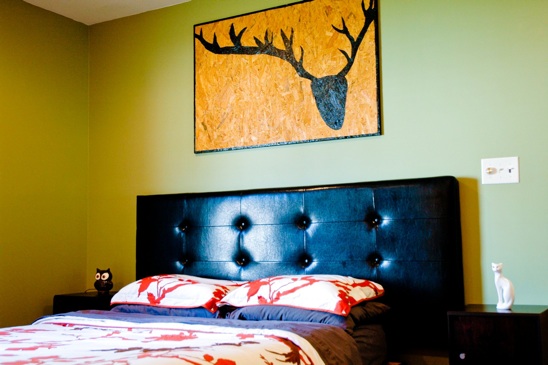
Ah…my bed. Nothing is better than coming off the road, leaving behind hotel rooms and not-so-sure-if-they’re-clean sheets…to this room. It may be plain, but it is complete serenity for me.
Learn how to make the Scrappy Art hanging over our bed.


We reconfigured a huge ‘bonus room’ to be our master bedroom. And wouldn’t you know it, we got a fireplace out of the deal? I love lighting this sucker in the winter, drinking tea and eating my homemade ginger snap cookies. I just might have to share my secret ginger snap cookie recipe. Those cookies make me salivate just thinking about them. Yum…I think I need a moment.


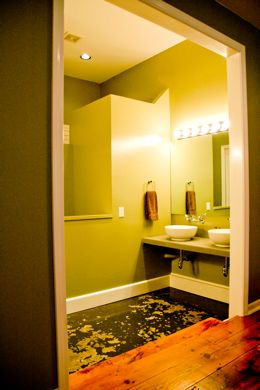
We made a dream bathroom out of a weird stinky moth-ball hallway and some wasted space in a ‘sauna’ room.
I love our bathroom-concrete floors and countertops, two sinks, a huge walk-in shower with two shower heads…


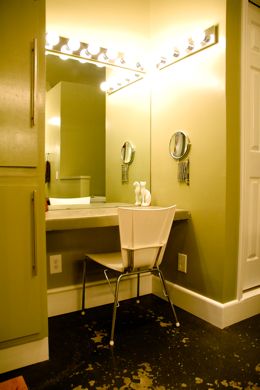
…and my own make-up area that Biceps has no reign over.


Little known fact: I like to throw parties, I like to entertain, I like to feed people until they can’t eat anymore.
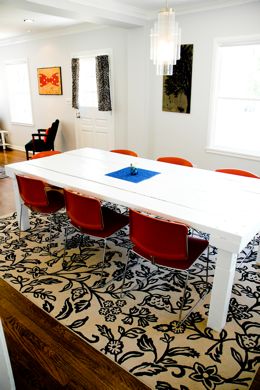
The size of our dining room table was therefore very important to me. I wanted something to seat twelve while the entirety of the menu sat in the middle of the table for those second-helping kind of people.
We made the table from more barn wood salvaged from the in-laws
family barn.


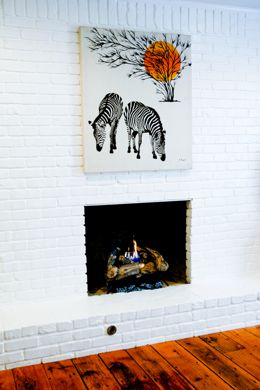
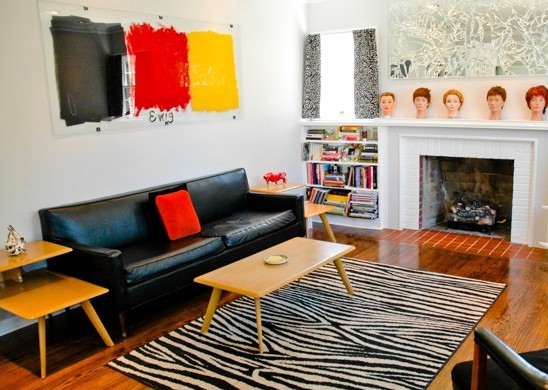
Our living room is perfect for us. There’s a great amount of space to expand into, the fireplace is perfect for those cold Tulsa winters….

(Learn how to make the Mirror Art hanging above the fireplace.)


And the mannequin heads on the mantle watch over us all. And they tend to creep out our more delicate guests that aren’t used to this sort of thing.


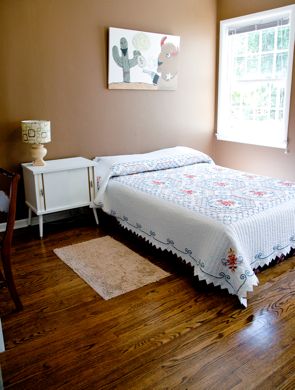
Our guests stay in our ‘Cowboy Room’. There is no relationship to this name and our weirdo cat. Cowboy the Cat is not allowed in this room. It is a fur-free zone.
I like retro cowboy-esque type stuff and Biceps let me pretty much do what I wanted to in this room.
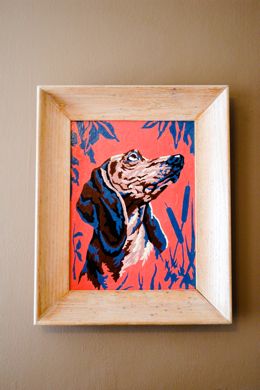
Very unusual…..


Three vintage finds-the lamp, the shade and the nightstand. I repainted the nightstand and added the stripes. Total invested in this picture-$14. Boo-yeah.


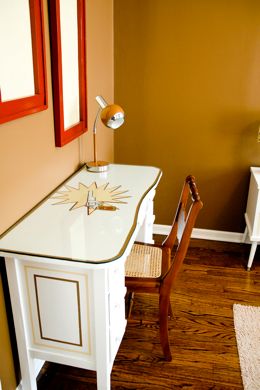
The desk was left behind in the shed when we purchased the house. I sanded and then spent hours painting this thing. I don’t think I have ever painted a gun on anything before.


Well, thanks for stopping by.
There’s more, but no need to bore you.
Come back anytime. I like guests.

Read more