Tag Archive for: dining room

Installing Picture Frame Molding

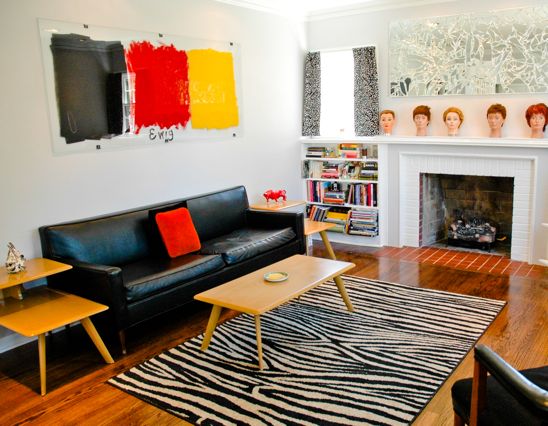
I was inspired by this professionally designed living room and wanted to make changes similar in both my living and dining room.

Photo Source Woodson and Rummerfield’s House of Design
Molding can inexpensively transform a bland wall (which I definitely had) into a showpiece (ka-pow!).


Picture Frame Installed

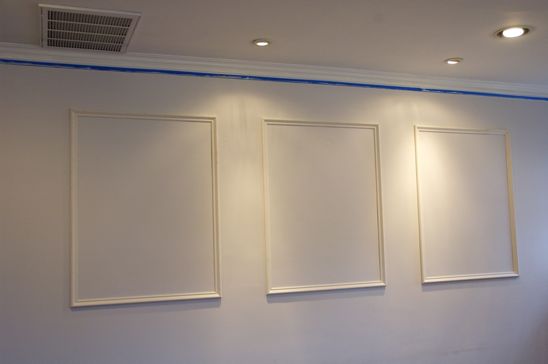
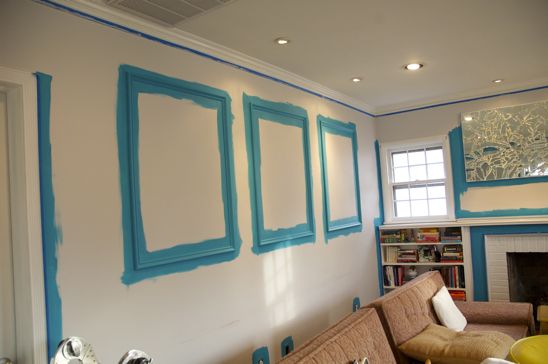
This is the simple picture frame molding that I installed in my living room. And once I slather some fancy blue paint on it-the “ka-pow” will be happening.

It’s so simple to do, you won’t believe it. Let me show you how!


Here is all that’s needed to install Picture Frame Molding properly:
Skill Level: Easy
Time to Finish Project: Varying depending on size, approx. 30-45 minutes per frame

Chop Saw (or hand saw and a manual miter box able to cut a 45 degree angle)
Brad Nailer, 1 1/2″ Brad Nails, Air Compressor & Hose (or brad nails, hammer and nail set)
Level
Tape Measure
Stud Finder
Molding
Paint
Spackling
Bright White Painter’s Caulk (no silicone) and Caulk Gun
Paintbrush
Blue Painter’s Tape (only if painting the molding a different color from the wall)


Steps 1-4
1. After determining the size of the picture frame, cut the molding to length. I had (4) pieces, cut 2′ long to make my frame. Set the chop saw to cut a 45 degree angles from Right to Left.
2. Cut a 45 degree angle Right to Left on one end of each piece of trim.
3. Switch the 45 degree angle on the chop saw to cut Left to Right. On the uncut end of the trim, cut a 45 degree angle left to right.
4. Make sure the trim fits together in each of the four corners.


Steps 5-8
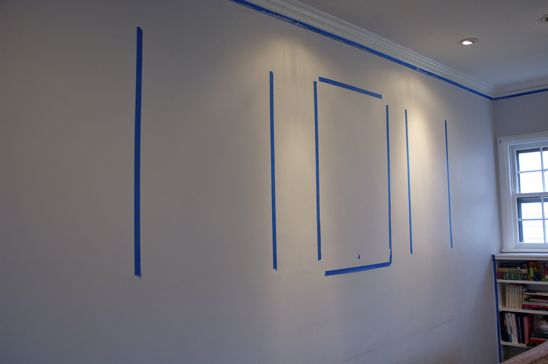
5. Using a stud finder, determine and mark where the studs in the wall are in relationship to where you will be placing the frame.
6. Begin with the top piece of the frame and level.
7. Position the nail gun over the stud and shoot through the molding and into the stud. (If there are no studs where you desire to place the trim, shoot the nails through the molding at an angle, coming first from the right, then the left and so on until the molding is secure.)
8. Now, repeat these steps with each of the vertical side pieces of molding and finish with the bottom horizontal piece.


Steps 9-12
9. Once all of the molding is installed, fill the nail holes with spackling.
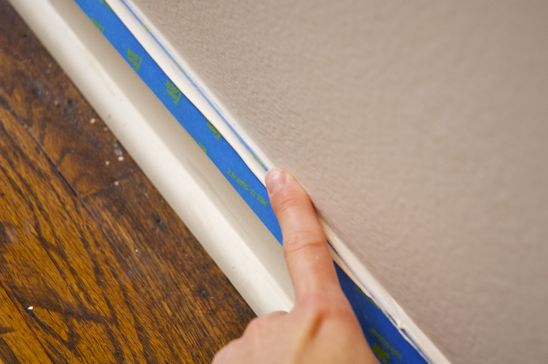
10. If you are painting the molding a different color than the wall, use the blue painter’s tape and first tape off the wall surrounding the picture frame, leaving an 1/8″ gap between the molding and the wall. Caulk the corner seams of the molding with Bright White Painter’s Caulk.
11. Caulk the inside and outside seams of the molding. If you are painting the molding a different color, the caulk will seal the seams and create a barrier between the wall and the paint color.
12. Remove excess caulk using an index finger, sealing the seams.


TrimCut in
Next up-paint! I wanted my trim to be wall color. If you would like your trim a different color than your wall, all you will need to do is tape and caulk the surrounding trim and cut in the trim with a brush.

Easy peasy!
 

Read more

The Beginning of Change-Budget Living & Dining Room

For years, I have been toiling over what to do with our living and dining room. I’ve gone to you all, my dear readers, in months gone by with my initial thoughts and asked for your opinions. I’ve badgered friends and cats with this subject over and over.


Living Room
Because frankly, this room was boring. Clean? Yes. Minimalistic? Yes. But, B-O-R-I-N-G? Double yes.

And although I felt ready to pull the trigger, there were many objections for change:
1. Financially I can’t in good conscience spend money redoing something we just did 5 years ago.
2. If Biceps had his way, this room would have had center seating (black), gray walls and little else. He wanted to go for the art museum feeling.
3. I hate taping and caulking.
4. I hate cutting in trim.
5. I hate cleaning out brushes and roller.
6. I’m pregnant and flat out didn’t want to.


Living Room
I decided to finally quit talking about changing the living room and the dining room and just get this thing done. Using many of these items above as inspiration, the trigger was pulled–while Biceps was at the station and couldn’t stop me. Heh heh.


Taping:Caulking
I started by assessing the initial costs:
1. Paint $60
2. Blue Painters Tape, Painters Caulk, tray liners $25
3. Trim for picture frame molding $36

After buying my necessities, I rolled up my sleeves and got to work. First, I pulled everything into the center of the room and started taping and caulking like a son of a gun. (I will share the reason behind this process in detail this week).


PicFrameTaped
I waited for Biceps to determine the size of  the picture frame moldings. It was a long process, which enriched our marriage. (I will also show you in detail how to install your own picture frame molding this week).


TrimCut in
While Biceps was back at the station, I opened my can of paint and panicked a little. Was it really that blue? After a short stint of talking myself off the ledge, I grabbed my favorite Purdy brush and got to work cutting in the trim.

And didn’t stop for 2 days. The living and dining room is now a lovely shade of “exotic sea” blue, which Biceps and I both love (thankfully).

Don’t worry, I will show you the finished product after hanging all my lovely art work. That is another process that is enriching our marriage.

But–I’m dying to know–what do you think so far?


Read more

It’s Wednesday. And My Living Room is Still Gray.

House Theorem #17:Once you move into your house, you no longer want to remodel.

The things that just “had to go”, like peach tile in the guest bathroom, suddenly pale in comparison to just hoping for sheetrock and a working sink.


The green color that you painstakingly chose for the master bedroom and bathroom and at one point that you loved, soon is loathed each and every day. I blame my father’s army roots on this color choice.

But although you loathe it, it still takes you three long years to change it. Because you are waiting for it to “wear out” and earn its keep.


House Theorem #108: Once your walls are gray, you are scared to paint them a bold color, like this:


Aqua Blue with hints of bright orange, tan and browns. Because perhaps this is another green bedroom and you (and your guests) will have to live with it for years until this color too, has “earned its keep”.


So, it’s Wednesday. And my walls are still Gray. But, who knows-Sunday’s on the way.

(And if you know who I’m quoting from 80’s Christian pop music, then you deserve a hug. And some shoulder pads.)

Read more

Remodeling and Regrets-the Living & Dining Room Debacle

Dear Readers:

I have been dragging my feet for quite some time on an issue I normally attack with my ninja skills. I want to repaint and redecorate two rooms in my house:


The Dining Room


And the Living Room.

Now, there’s nothing wrong with these rooms and I do feel rather American wanting to redo a perfectly good room. The idea when we first chose this light gray paint was to have a very minimalistic, clean look (Bicep’s desire) but with a little color (my desire).

However, it just feels cold and blah.

I am determined to do it with no money out of pocket. This means selling things I own to buy new decor and paint, making deals and waiting for sales. I have been patient, grasshopper.


Here’s what inspired my color choice originally. While on tour, I came across this unique cinder block fence. I loved the turquoise color and filed the color in the back of my little creative brain.


Months later, I put together my case for change and presented this color board to Biceps. Lo and behold, the minimalist man liked the idea and enthusiastically supported it.

He has become a big supporter of my decorating prowess after I redid the Master Bathroom and Master Bedroom while he was on tour. I think he became this aforementioned big supporter mainly because he didn’t have to do any of the work. Heh.

So, dear Readers:

Here’s why I am writing to you. I have the inspiration, the go-ahead, the non-budget-budget and the time. It’s getting to the ridiculous point of just needing to pull the trigger and I can’t seem to do it. I think I’m afraid to paint a color so bold and possibly trendy. Should I just jump in, no regrets and slap that paint on the walls?


Read more