Tag Archive for: bohemian

Mod Log Table

I have been dreaming of an outdoor end table for quite some time. When my neighbor decided to chop down his very dead pine tree, the opportunity afforded itself.
I love neighbors with chainsaws.
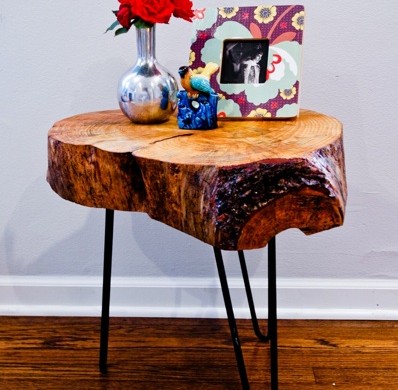
Here’s a view of the finished Mod Log Table. Yes, it’s inside my house. No, it hasn’t spent a day outside yet. I think it’s kind’ve pretty inside…


In order to make your own Mod Log Table, you’ll need a dead tree-preferably very dead. I hopped the fence into my neighbors yard and picked out my victim from amongst the carnage laying before me.


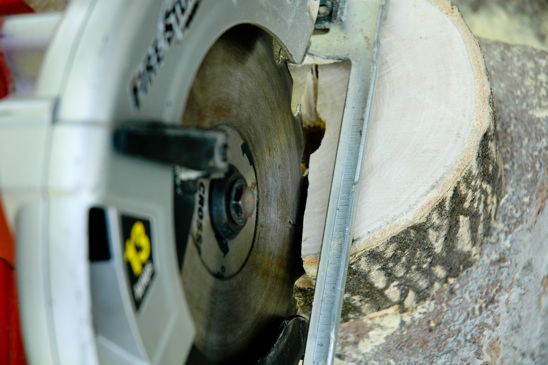
I let my Little Mini chainsaw rest while I borrowed the neighbor’s beefier chainsaw. I tried to make the cut as even as possible, knowing I would have to sand down any high points on the wood later on.


I had some vintage legs laying around, but you can use pre-made legs that you can buy at Lowe’s. You’ll also want lag screws to fasten your legs to the log, polyurethane, a foamy brush, and gloves. You’ll want some steel wool & a microfiber cloth for in between your poly layers.


You’ll need a drill with a drill bit slightly smaller than your lag screw and a belt sander with 40 & 80 grit sandpaper, a socket set and a level(not pictured-sorry!).


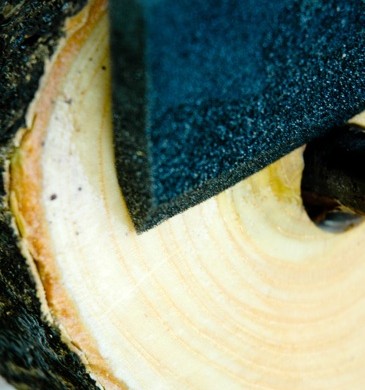
Sand the top and bottom of your log until it’s smooth, starting with the 40 grit. Use the 80 grit for your fine sand.
That’s fine, baby, that’s fine….


Once your log is smooth, use small set screws to temporarily attach the legs to the underside of the log. Outline the table legs (so when you remove them later on, you’ll know where they go) and flip your table over to check for it being level.
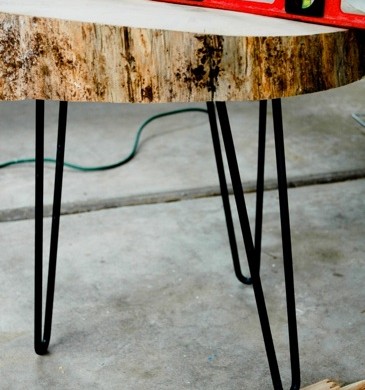

Using your level as shown, ‘shim’ up your table leg until the table sits level. Measure the amount you will either need to router out of the underside of your table, or shim up with scrap plywood.
Or you can choose to sand it even more until your shoulder falls off.
Flip your table back over and remove the legs.


I cut out pieces of plywood with a jigsaw to make up the difference I had measured earlier in order for the table to be level. I chose to shim up my legs, mainly because I do not own a router. This doesn’t look quite as finished, but for an outside table, I was ok with it.


Drill pilot holes for your lag screws or for your pre-made table legs using a drill bit that is slightly smaller than the screw you’ll be using.


Use a socket set to insert your lag screws, if you have legs like mine (tee hee). If you have pre-made legs with the screw already sticking out of the end, just screw them into where you drilled your pilot holes.


Wipe the table down with a microfiber cloth-get all the nooks and crannies. Now it’s time to make it pretty! Enough of the functional stuff. WOO-HOO!


Apply your first layer of polyurethane and let dry according to the manufacturer’s instructions. It’ll be so purty when you’re done with the first layer!


Use your steel wool to get any of the bubbles out by ‘sanding’ it lightly.


Use your steel wool to get any of the bubbles out by ‘sanding’ it lightly.
Wipe the entire thing down again with your microfiber cloth. Apply another coat of poly and let dry.
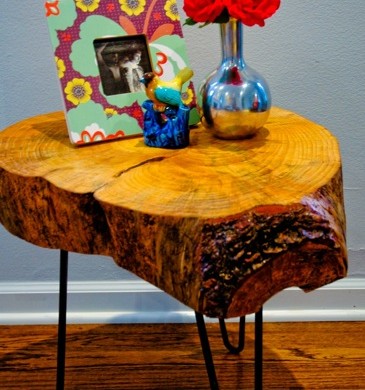

You now have such a cute table, you may not be able to bring yourself to put it outside. Mine hasn’t made it outside yet. I keep telling myself to let go…but I’m worried it will be lonely outside…

Read more

Mod Deer Hoof Coat Rack

*DISCLAIMER: I used this project awhile back as a guest blog for someone else. It caused a mild uproar when a woman commented that it was ‘gross’. If you don’t like to see the hooves of deer, please bail out now.
I would hate to gross you out. Over and out.*

I have been wanting a coat rack by our front door for a couple of years. Our guests must pile their coats on our bed, which of course becomes the perfect nesting ground for Cowboy.

I live in a part of the country where the phrase ‘He’s packing’ doesn’t mean ‘He’s preparing for a trip’.
Naturally, I thought, ‘If one can make gun racks out of deer hooves, why can’t one make a coat rack out of them?’
I searched on ebay and found five deer hooves that would be shipped to me for $5 each.


What you will need:
Wood Paneling-I bought my 3/4” tongue and groove from Habitat for Humanity
3/4” x 1” ‘L’ shaped trim
Deer Hooves
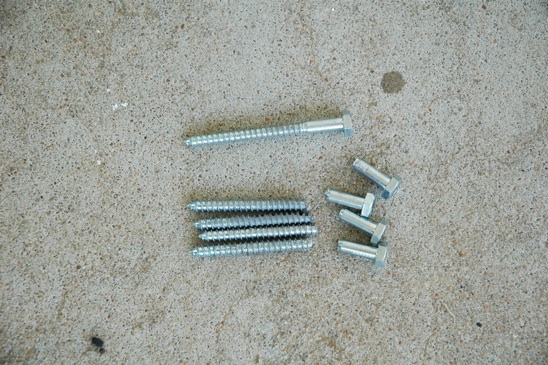
Lag Screws-mine are 2”
Epoxy
Oops Paint-I used glossy black
Paintbrush
Level
Tape Measure
Sawzall with metal blade, or a hand saw with metal blade
Skill Saw with a wood blade
Square
Drill & Drill bit a little smaller than your lag screws
Studfinder


You’ll also want a:
Hammer
Finish Nailer, Nails & Compressor (or you can use ‘brad’ nails & a hammer)


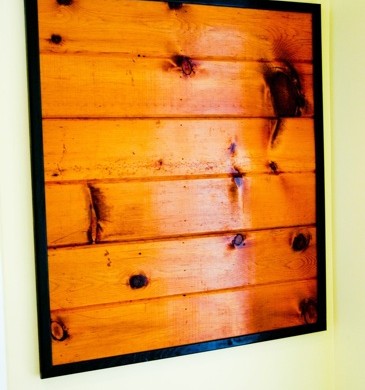
My wood was pretty damaged in several areas. I determined that I had enough to make a 30” x 34” coat rack. I marked the pieces that I wanted and drew a ‘cut’ line using my square.


Using my skill saw, I cut those suckers down and then double checked for accuracy.
I always double check myself. My accuracy tends to be unreliable. I guess you could call me ‘reliably unreliable’.


Find your studs by using a ‘stud finder’ or tapping a hammer lightly against the wall.
Starting with your top board, make sure it’s level before using your finish nailing to attach it straight to the wall and hitting the studs.
I painted my ‘L’ shaped trim black and cut the ends to fit at a 45 degree angle. I used my finish nailer again to attach the trim to the tongue and groove boards.


My deer hooves did not have a screw already mounted in them-some do. If yours don’t, clamp the heads of your lag screws with a strong table vice and use a metal bladed sawzall or hand saw to cut the heads off of the screws.
‘Off with their heads!’


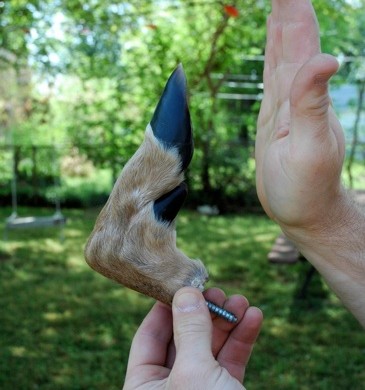
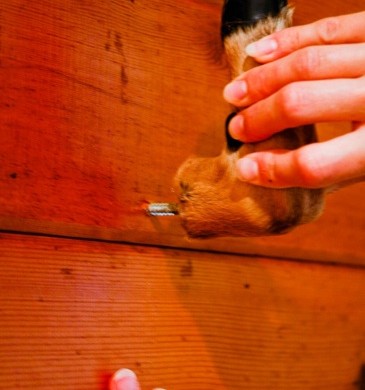
Place the cut end of your lag screw into the hoof, filling the entire cavity with epoxy. Let dry for the manufacturer’s recommended time.
That is Biceps’ un-manicured hand, not mine. However, mine isn’t far from this….


Once the epoxy has hardened, give your hoof a ‘high-five’ just for good measure and to keep the neighbor’s guessing.


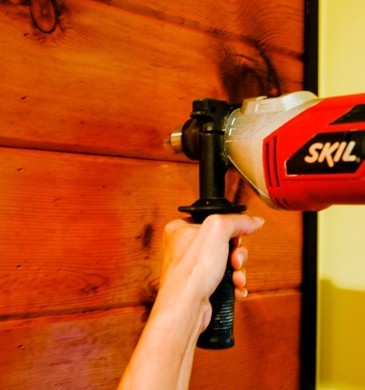
Using your level, mark where you would like your hooves to be attached on the wood paneling. Drill pilot holes into your wood paneling.


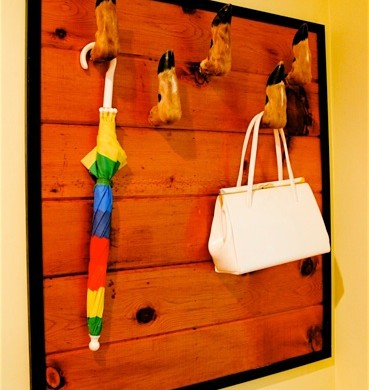
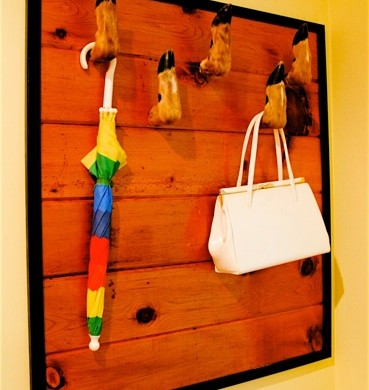
Screw your hooves into the pre-drilled holes and then stand back to enjoy your creation.


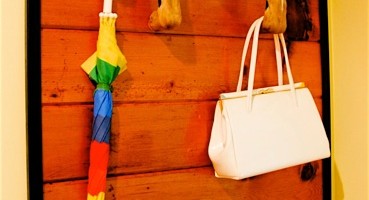
‘Modern-Bohemian’ is what I call it…with a touch of ‘weird-functionality’.
I hope I didn’t gross you out. Please let me know if I did…

Read more

My Lamp, My Lamp, My Lovely Leftovers Lamp

Check it out!
While Biceps and I were on a romantic date at Habitat for Humanity, I scored a swag light down rod and a trash can cover for $1. He always takes me to the coolest places. I knew I could make something from them, and he couldn’t argue with the price.

You may already know that I have an affinity for log-inspired pieces around my home. (Check out my Mod Log Table). While passing by one of my rent houses, I saw a felled tree and grabbed a chunk of it from an old pal’s front yard. With my two Habitat pieces in hand and now my chunk o’ log, history was about to be made.
Or at least a ‘Lovely Leftovers Lamp’.


Here’s what you’ll need to make your own ‘Lovely Leftover Lamp’.
A drill with a paddle bit (I used a 1”)
Router or a Skill Saw
Belt or Palm Sander with 40 & 80 grit paper
Polyurethane and Foamy Brush
Tape Measure
Chunk o’ Log with the cross-cuts parallel to each other (mine is 3 1/2” tall and 7” in diameter)


You’ll also need:
Trash Can Cover (mine was 8 1/2” in diameter-you could use fancy tin cans, or learn how to make your own Cutey Cans)
Swag Down Rod
Additional Wiring, wire nuts & Switch (if the old wiring is sketchy looking)
Spray Paint that matches your trash can cover
3” Threaded Rods
3/16” Threaded Aluminum Posts


I sprayed my 3” Threaded Rods and 3/16” Threaded Aluminum Posts GOLD to match the rest of my lamp.
These little buggers will attach the trash can cover to the down rod.


I sanded my log to be baby smooth, starting with a 40 grit and then moving up to an 80 grit.


After your log is smooth on both sides, measure the diameter of your log and mark the center.
Easy enough.


I used a 1” paddle bit to drill through the center of my log which accommodated the 1” diamater of my down rod. Adjust the size of your bit to the size of your down rod.
If your down rod is bigger than 1”, you may need to use a hole saw (which also attaches to your drill).

Drill all the way through, allowing your drill to rest periodically when the bit gets too hot. A hot drill bit and a lot of sawdust tends to have a weird reaction that I like to call ‘Fire’.


Next, we’ll make a channel on the bottom of our log for the wiring to come through.
It would be best to use a router, but since I didn’t have one, I went with a skill saw that I depth set to 1”. You aren’t cutting through the whole log, just making a channel for your wiring.


I know this channel for my wiring isn’t that pretty, but since it’s the undercarriage of my log (weird) and I will be covering it with some sort of soft feltiness in the long run, I was alright with it. Now that all of the sanding and cutting is done, wipe off your log thoroughly with a microfiber cloth.


Break out the poly and your foamy brush. Apply a thin layer of poly to your log. Let dry according to your manufacturer’s directions. Once the log is dry, use a steel wool to lightly sand the top and bottom, removing any air bubbles.

Re-apply a second coat if you desire. I usually desire.


I needed a longer run of wire, and decided to tie in some white wire that I had leftover from another project, using two wire nuts that didn’t match and one of which was covered in a sticky substance.
Don’t judge. I’m going for cheap here.


Line up the tips of your exposed copper wire which should be about a 1/4” long, and place the wire nut on top of the two wires (Connect the ribbed wire-it will feel like it has ribs on it, to the other ribbed wire. Connect your smooth wire to your smooth wire).

Screw down the wire nut as far as possible and pull the wires away from the wire nut, making sure they are firmly attached. I used electrical tape around the nuts and wires, just as an added precaution.


Place your down rod through the hole you drilled in your log, feeding the wire through the channel on the bottom of your log. You can cover the bottom of your log with felt or fabric using a hot glue gun.
I know you guys like your glue guns. Get crazy.


I wanted a switch on my lamp, and since they are super easy and cheap, I went for it. I like cheap and easy.
Follow the instructions on the package. It took me less than a minute to do this.


Flip your log over. Attach your trash can cover to your down rod by using your spray painted threaded posts and rods. Feed the 3” threaded rods from the outside in, threading it into the top of the down rod where a globe is usually attached. Use your threaded posts to cap the end of the threaded rods on the outside of your trash can cover. If you have a solid cover, you may need to drill out tiny holes for your threaded rods to go through.

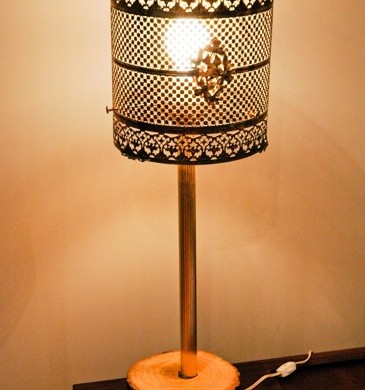
Let’s plug it in!


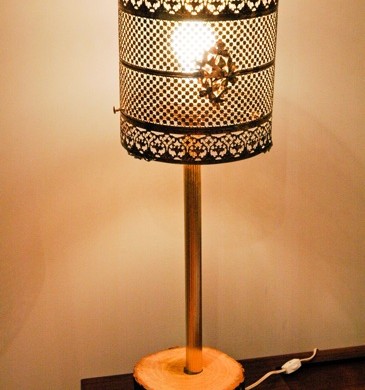
Isn’t it just so purty? I love my new ‘Lovely Leftovers Lamp’!

Read more

Mod Filing Cabinet

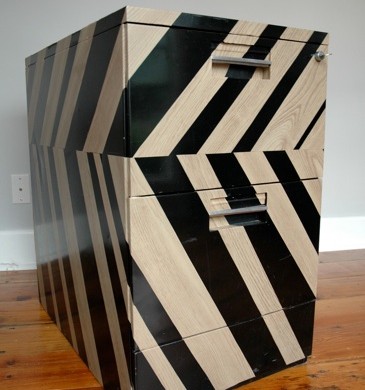
I was tired of the clunky metal object mocking me from the rest of my very ‘cool’ office.

I was inspired by something similar in a Ready Made magazine (now defunct) and just had to try it on my own, of course putting my own little spin on it.


What you will need:
Filing Cabinet-I picked mine up from craigslist for $15
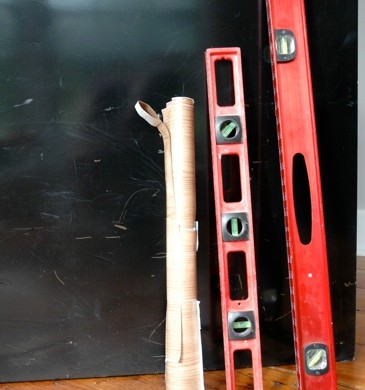
Contact Paper-I chose a wood grain birch (found at Lowe’s)
2’ or 4’ level
Exacto Knife/Scissors
Pencil


Using your level, draw a straight line across the middle of your filing cabinet. This will be the end point for your contact paper. I chose to put the line about a third of the way down of the filing cabinet, instead of a predictable half-way mark, just to make things interesting. I don’t like to be predictable…


Using your level, draw lines at 3”, 2” and 1” of thickness onto the contact paper to make the stripes. The angle you choose to have your contact paper at on the filing cabinet and the depth of your cabinet will dictate how long your strips need to be. Cut your differing width of stripes from the contact paper, overcompensating for the length.


I temporarily taped all of my stripes to the side of the filing cabinet, and adjusted them until I liked the look of them, before permanently adhering them to the cabinet. I have learned to do this the hard way. Let’s just say it is very difficult to remove contact paper from anything. Next, I drew little ‘tick’ marks onto the filing cabinet, notating where each stripe went, so I would remember in what order to adhere them to the cabinet.


Using a level, draw a line across the bottom of your taped contact paper stripes that coincides with the line you had originally drawn on the actual filing cabinet. This will make the bottom angle on your stripes. Remove your stripes and cut the tips off with your exacto knife or a pair of scissors.


Peel off the backing from your strips and began to place the stripes onto the filing cabinet, following your earlier notations. Smooth out the bubbles as you go.


Use your exacto knife to cut the top of your stripe off, leaving about an 1/8” to wrap around to the other side.


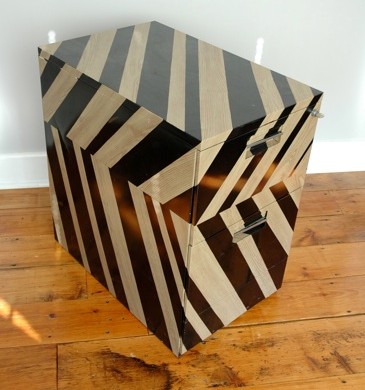
Repeat this process around the entire filing cabinet. If you have recessed pulls like I did, cut your stripes extra long in order to tuck the contact paper up and around your pulls. When placing the stripes on the drawers, cut them extra long in order to wrap around the edges of each drawer.


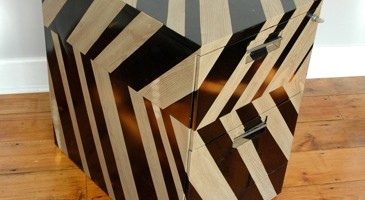
Now you have a ‘very cool’ filing cabinet! No more mocking us, Mr. Clunky Filing Cabinet!

Read more