Archive for category: Anyone Crafts

Scrappy Plywood Art

I am not a professional painter, by any means. However, what I do have is plenty of time on my hands, leftover remodeling bits and a little creative inspiration. A small budget and the need to have some crap on my walls is my creative inspiration.
Today, we are going to make a piece of art from cheap plywood. And, it’s gonna be awesome.
What you will need:
Oops paint (this is paint that has been mis-tinted and is usually $5 a gallon at most hardware stores), or leftover paint you no longer have feelings for.
A paintbrush, sanding block or sand paper, a tape measure, a skill saw with a wood blade, polyurethane (I use the fast drying kind) and a scrappy piece of plywood.
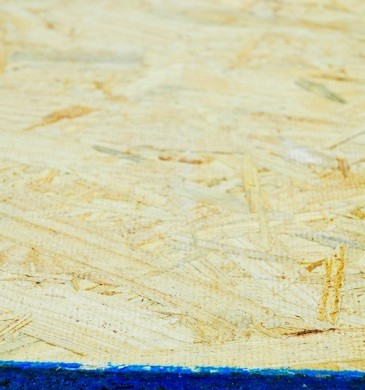

I spare EVERY expense when it comes to art that I might burn later on if I hate the outcome. Get the cheap ‘chipboard’. It has a blue edge. A 4×8 sheet of this stuff costs around $10, or go by a salvage store and buy some scrap.


You will need an electric drill and 2” drywall screws (that is, if you want to hang your art directly onto the wall like I do.) Otherwise, you can mount picture hanging devices on the back and hang it the old fashioned way.


Custom measure how big you want your artwork to be. Draw a line with a level and cut that sucker.
I wanted a large piece over our bed, so I went with a 4’x3’ piece of scrap plywood.
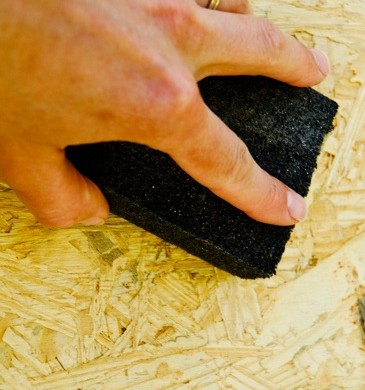

Sand the edges and any burrs that are sticking up on the face of your plywood lightly.


Next, draw a silhouette-type design on it. I decided to go for a deer head with antlers.
I know, don’t freak out. If you think you can’t draw, google ‘silhouette’ and find a design you like. Print it off and outline your design like you are in kindergarten. Don’t worry, it doesn’t have to be perfect.
Check out my line work below and it will make you feel better.


Use your oops paint to fill in the silhouette. Again, it does not have to be perfect. This is a rough piece of plywood and the paint will not go on in a straight line all of the time. That’s what makes this cool…and easy.
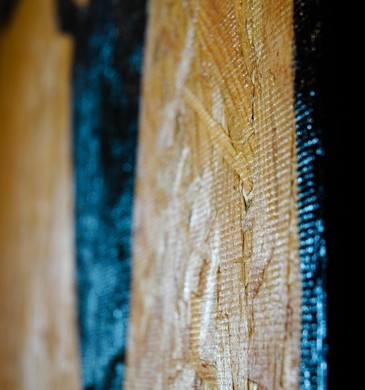

Paint the edges of the plywood and wrap it around to the front of your painting about a half of an inch. This will make a nice border to showcase your awesome talent.


After your paint has dried, break out the polyurethane. I usually buy one of those disposable foamy brushes, but I didn’t have any on hand. If are applying polyurethane with a paintbrush, make sure that it is an ‘oil’ paintbrush. You will also need mineral spirits to clean it out. Yuck.
Thus the reason why I usually buy a foamy brush. Let the poly dry. You can apply a second coat of poly if your wood is really thirsty or you want it doubly shiny.
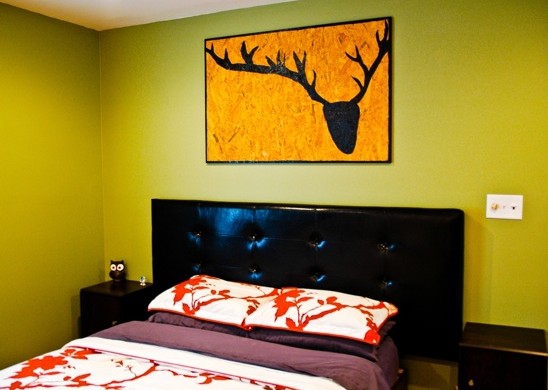

Now is the glorious moment.
I hung this piece by drilling straight through with 2” drywall screws on the black sections of the silhouette. I then touched up the screw heads with more black paint.
You can also use picture hanging devices that attach to the back side of the plywood and hang it as most normal people do.

But you know I have never enjoyed being normal…

Read more

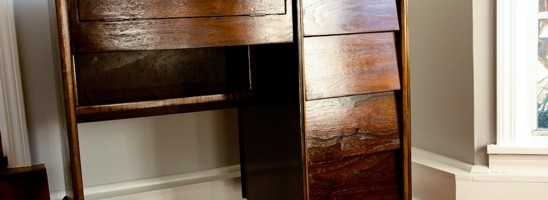
A $10 Sewing Cabinet Makeover

I hunt for bargains.
I got this little number at a Habitat for Humanity and fell in love immediately. This little guy needed a second chance at life and I’m just the girl to make it happen.

I love to sew and have always wanted a really functional sewing cabinet. This not only had drawers for scissors, tape, etc…but the two sides flipped out to give you some more working room. Bonus.
Here’s what you need below.


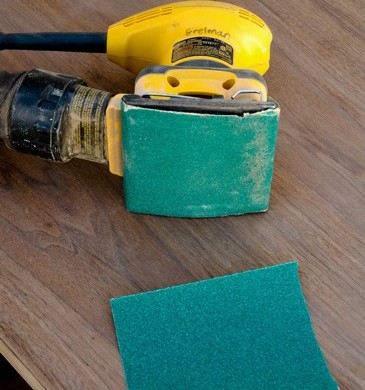
You will need sandpaper. I recommend the 120 grit (on the left) if you don’t have to cut through years of stain or paint.The 80 grit (on the right) is tougher and can cut through thicker stains or stubborn paint.


You will need a palm sander and extension cord.


Grab yourself a pair of gloves-save that manicure; polyurethane-I chose the fast drying clear gloss, three foamy brushes, a drop-cloth and a rag. You will also want to choose which color of stain you want, or you can go au natural. I chose a stain we had in our shed, which you will see later on.


You’ll need two microfiber cloths and steel wool, as well. I think that’s about it. Now on to the lesson!


Take one of your sandpaper sheets and fold it in half.


Then fold the half in half, creasing the folds.


Tear the sandpaper down the creases making four squares.


Take one of these squares and attach it to your palm sander. Watch those fingers-I have been pinched one too many times….


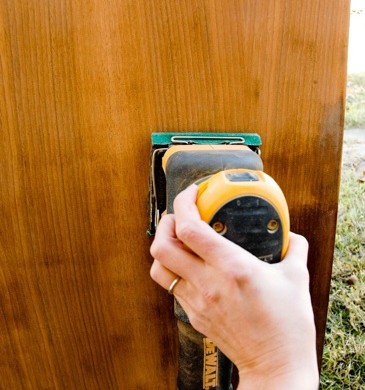
Sand in the direction of the woodgrain. You may have to go over the piece a couple of times. Use a square of sand paper to hand sand anything your palm sander cannot get to.


Once you have sanded the entire thing, vacuum every nook and cranny.


Then use a microfiber cloth to get any left behind bits o’ dust. Run it over the entire thing thoroughly. I recommend doing this two or three times.
Please ignore my weird looking hand. I blame it on my camera’s perspective.


Find an inconspicuous place on your piece of furniture-like the bottom of it or the backside and test out your stain samples. I chose the one at the far right. It’s called ebony. There is no ivory stain, I checked.
At this point, I would recommend bringing your item indoors and laying down a drop-cloth.


Using your foamy brush, apply a thin layer of stain in the direction of the woodgrain very slowly. Make sure you are checking for drips or pools of stain the whole time you are staining.


Use a rag to wipe off the excess stain. ‘Nuff said.


Then let the sucka dry following the manufacturer’s recommendation.


Time for the polyurethane, which I like to call the ‘OOH! moment’, cuz it’s pretty. Carefully open the poly can and stir in a clockwise direction. Do not pull up from the bottom like you normally do with paint. Stir the poly frequently during application. Dip a NEW foamy brush into your stirred, not shaken, poly and apply it while following the woodgrain once again. Let dry-mine took 4 hours to dry indoors, but follow the manufacturer’s recommendation.


Using a steel wool pad, slightly scuff the dried poly by following (yes, you guessed it!)-the woodgrain.


Take a clean microfiber cloth and wipe that thing down, in any direction you like this time.


Back to the poly for your second coat. Apply a thin layer following the woodgrain again. Let dry the recommended time. And then….


POW!
And ZAM!
And BOO-YEAH!


And then, mark this momentous occasion with a glass of red wine.
Or white. Your choice.

Read more

How to Make a Sock Giraffe

I tend to bust through my socks quickly. I hate to admit this, but I must have very pointy toes.


And I am a firm believer when life hands you holey socks, you make stuffed giraffes out of them. This is not a fine science, and it’s best if you have two pairs of socks that are alike in size. But, if you don’t-improvise.


To make this sock giraffe, you will need four small socks that are cute in nature, scissors, a tape measure and a sewing machine.
If you have two opposing sock patterns, this makes for one cute giraffe.


You will also need a funnel and jasmine rice. You could also use dried beans or corn kernels…but I like the way the jasmine smells.


Cut the elastic band off of the opening of one of the pairs of the sock.
Then cut both socks from the top to the bottom on the back side (the side where the heel would touch).


Choose one of the two socks to be the giraffe’s head and neck. The other will be the stomach and booty.
The sock you chose for the head/neck, from the toe of the sock, cut two inches up. This will be the mouth.
I chose to take one inch of material out between the toe and the heel from the head/neck sock in order for the giraffe’s head to be proportionate to the body.


Turn all of the material inside out and lay flat.
Pin the ‘mouth’ to the ‘head’ by unfolding it first. Then, sew the ‘mouth’ to the ‘head’ first with a simple straight stitch.
Pin the ‘head’ to the body by unfolding it first. Then, sew the ‘head’ to the body’.


Time to use up your other pair of socks! Cut from just where the heel seam ends towards the toe of the sock, two inches in width. These will be the back legs. The heel of the sock will create a natural hip for the giraffe.


Now, cut the tip of the tow off of the sock to create a straight end for the leg which will be the giraffe’s foot. Turn the leg piece inside out and sew it together, leaving the straight end (giraffe’s foot) open to stuff with rice later. Save the toe piece to attach to the belly later on.


Cut the remaining section off of the sock we’ve been using. This will be the giraffe’s belly.
The square section of the sock will create the giraffe’s two front legs. Cut this square section in half.


Here is a shot of what the giraffe might look like before we are done sewing it.
I changed up the ears and tail, so don’t get too attached.


Remember our belly piece and the toe piece we saved? Sew them together to look like the picture below.


Here is the belly sewn together. Isn’t it cute?


With the belly piece and the body piece inside out, pin it to the body by starting at where the giraffe’s booty would be until you get to the neck.


Sew the belly to the body and straight up into the neck.
When you turn the body/belly right side out, it should look like this, but with the head attached and sewn together as well.
(You will notice that I had forgotten to sew the head to the neck first. Big mistake, please ignore this little oversight.)


Once you have sewn the entire seam up through the neck and into the head, leave an opening at the mouth in order to put rice through.


I used some leftover material from the second pair of socks to make two triangular ears about an 1” tall by 1 1/2” wide and the tail about 3” long and 1/2” wide. Leave an opening for the rice by sewing together only three sides of each appendage. Fill them each with rice using the funnel if necessary (you don’t need to fill the tail with rice. Pin them close and hand sew the ends.


I cut little fringes on the tail for bonus cuteness.


Now, it’s time to fill the body with rice. Using the mouth hole that we left open, fill this cute little body with rice until he’s floppy. Sew a seam where the neck meets the body by separating the rice and running a straight stitch back and forth several times. You do this to keep the neck full of rice. Otherwise, the rice will continue to just fill the body up. Pin the mouth closed and hand sew it together.
Pin on the body where the legs and tail will be. Pin on the head where you would like the ears to be.


Pin the appendages to the body and hand sew them on.


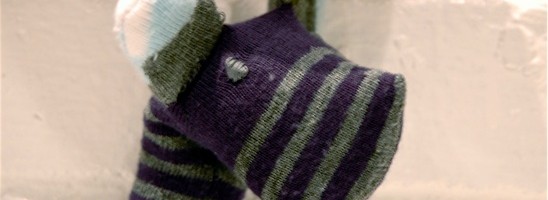
Hand sew the eyes on with a different color of thread by simply going over the same spot several times until it looks like this.


This is our cute little giraffe after he has everything sewn on. How cute and floppy is he? Or she?
I guess it’s up to the creator what the giraffe is….


My giraffe preferred the name, ‘Mr. Cool’, so I guess he’s a boy. Now, all you have to do is find someone who is in desperate need of a floppy giraffe and give this to them.
I gave mine to my nephew. Who in your life would want a floppy giraffe?

Read more