Barn Wood Dining Table
I love to fill up a person’s belly until they are beyond full…and then heap a dessert on top.
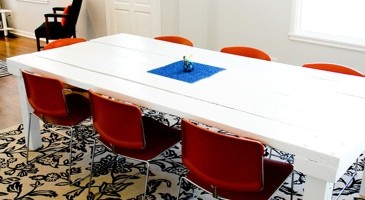
A large dining room table, with the ability to sit twelve, was a dream of mine.
And Biceps and I made it a reality-a beautiful, unique and inexpensive reality.
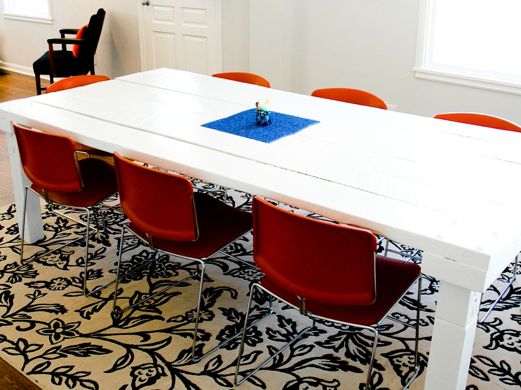
Using recycled barn wood from Bicep’s century farm, we made the indestructible table for about $50.
If you don’t have access to barn wood, don’t worry. I’ll tell you how to make this with dimensional lumber you can buy from Lowe’s.

What you’ll need to make your own dining room table:
Circular Saw
Drill with a 1/2” wood drill bit and a phillips drill bi
(16) 5” carriage bolts, 1/2” thick with matching nuts
A box of 4” wood screws
Belt Sander with 80 & 40 grit sand paper
Tape Measure
Speed Square
(4)Mailbox Post Holders (found at Lowe’s)
Socket Set & Hammer
Primer & High Gloss White Paint
Paint Rollers, brush

No barn wood? No problem!
Here’s what you’ll need:
(6) vertical table top pieces:1 1/2” thick, 8’ long, 8” wide.
(2) horizontal bottom pieces: 2 1/2” thick, 8” wide and 4 feet
in length.
(4) 4”x 4”Mailbox Posts (for the legs)

Using your speed square, measure your vertical table top pieces to be 8’ in length. Measure your horizontal bottom pieces to be 4’ in length.

Use your circular saw to cut your wood.

Line up your horizontal 8’ top pieces on your 4’ bottom piece.
Watch your fingers as you do this, unless you like that blood blister look. I know I do.
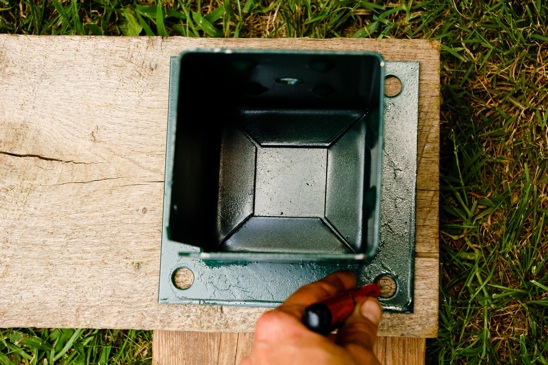
With the top side of your table facing up, trace the holes that will attach your mailbox post holder (legs) to your table top on each corner of the table.
(Note, you will be attaching the mailbox post holder underneath the wood you are seeing presently.)
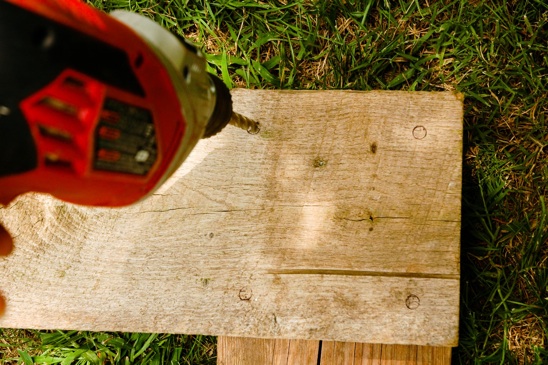
Attach your 1/2” drill bit to your drill and get to work, drilling through both the top piece and the bottom piece.
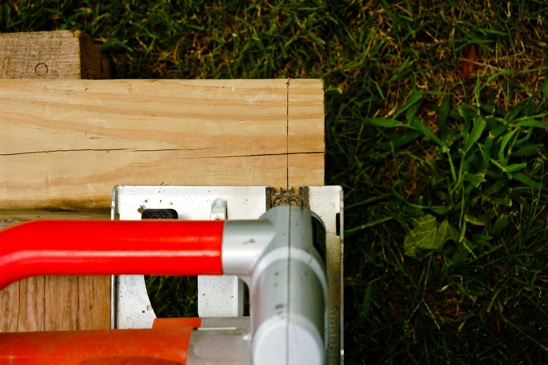
A standard table top height is 30”. The thickness of my vertical table top pieces plus the horizontal bottom pieces was 4 1/2” thick. I cut my four posts to 25 1/2’ tall to make the table at the normal 30” height.

Pound your mailbox posts into the holder like you just don’t care.

Now, pound your 5” bolts into your drilled holes like you just don’t care about that, either.
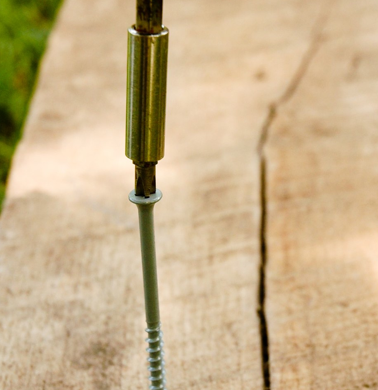
Screw in the rest of your vertical table top pieces to your bottom horizontal pieces with your 4” wood screws. I used about (6) wood screws per piece on each end.
Once all of your top pieces are attached to the bottom pieces, grab a friend, offer them a cold beverage and then con them into helping you flip the table over.
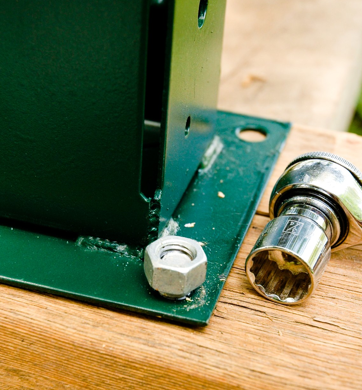
Use your socket set to attach the carriage bolt to the mailbox holder, tightening the nut as far down as you can.
Or in my case, as far as you can and then ask Biceps to finish it off for you.

Using a 40 grit sandpaper and your belt sander, sand the puddin’ out of your table.
Upgrade to an 80 grit for a nice smooth finish if you like. I wanted my table to be pretty rustic, so I stopped after the 40 grit.

Next step: paint-ville! Prime and paint your table and let it dry.
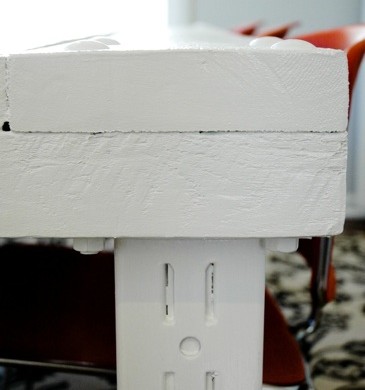
You’ll need to bribe approximately 4 strong men to move your table indoors. I bribed them with cake during my brother’s birthday party.
I am very, very sneaky….
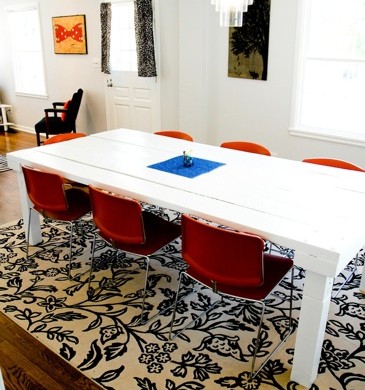
But trust me, the backache is worth it. You can sit twelve people around this table, have your entire meal in the middle of it and still have room to dance on top.
Not that this scenario has ever happened before. But if it did, the table wouldn’t mind.
It’s just that awesome.


[…] home, offering a fresh look to a room with little to no cost. Sometimes I tackle huge projects-like building a table, destroying a mirror, or making my own spinning […]